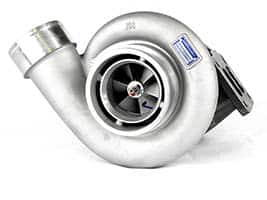
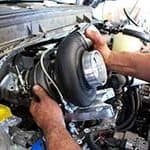
 If you’re a car fanatic who is always on the lookout on how to try and either upgrade or repair your vehicle yourself, replacing your turbocharger might have crossed your mind. Whether it’s a voluntary upgrade or a necessary repair, if you find that you feel confident enough to undergo the process, then read the steps below on replacing a turbocharger!
Before we begin though, if you are replacing your turbo because there is something wrong with it or it failed, then you need to ensure you diagnose the exact problem before beginning this job. There could be many reasons why you’re experiencing turbo problems, such as:
- Contaminated oil.
- Low levels of oil, which in turn causes low oil pressure.
- Foreign objects e.g. dust and small stones) entering the turbo.
- Turbo becomes exhausted from over-working.
- A blockage in the DPF.
For more information on turbocharger problems, check out our article: Common Turbocharger Problems.
Now, let’s return back to the main purpose of this article, how to go about replacing a turbocharger…
Steps On Replacing A Turbocharger
1) Before you begin to remove the turbo, it is recommended that you allow the engine to run until it is at the functional temperature, before turning it off and draining the engine oil extremely carefully (due to hot temperatures). This is due to the fact that the oil will have a low viscosity, so you will have a better chance of removing as much as possible. At this stage, you can add a can of engine flush to the mix and follow the instructions on the can to flush your engine.
Note: If you discover that the problem with the turbocharger is that is has failed completely and oil was found in the boost pipework, then you should avoid this step at all costs! This is because you run the risk of the engine falling into a hydrostatic lock (hydrolock), which is the term used to describe when the engine hydraulics itself on engine oil that is sucked in from the intake system, into the combustion chambers. This can result in devastating damage to the engine.
2) Next, you need to remove the old oil filter and discard it. We need to ensure everything is clean before we can even begin to think about installing a new turbo. Also, the oil feed pipe needs to be disconnected.
3) Now, for the next step of replacing a turbocharger; it’s time to prepare for the removal of the old turbo. So, you need to locate the exhaust pipe, more commonly knows as the downpipe, that connects your turbo and the remainder of the exhaust. Once found, all the bolts linking the turbo and the downpipe together need to be unscrewed. You also must disconnect the air intake system from the turbo by removing the bolts that join them together and detaching the piping. Similarly, the turbo intercooler needs to be removed and then cleaned from the inside to eradicate any signs of oil, so the best method would be for it to be flushed with the use of an oil degreaser and then left inverted to drain properly.
Note: You can also remove your old air filter, clean out the filter box (check for any damage) and replace with a brand new filter. Furthermore, whilst you are completing these steps, carry out some checks on the equipment to ensure it is in good shape, for example, search for any damage in the boost pipework, and make sure there are no oil remnants or dirt particles. If you do find damage, you should get replacements fitted.
4) We’re nearly there, now all that remains before we can remove the older turbo is separating the exhaust manifold from the turbocharger. What you need to do is unscrew all the nuts and bolts that hold them both together, and then when you are ready, lift the turbo through the top of the engine compartment or below it.
5) On to the fun part – installing the new turbocharger. You need to ensure that the new turbocharger you’re installing is the correct type for your vehicle, so you should compare it with the old one to be sure that all the linking parts are located in the same areas. After confirmation of having the correct device, you can join the new turbocharger to the exhaust manifold with all the necessary nuts and bolts, ensuring they are tightened to the appropriate degree (if you’re unsure, refer to the torque values stated in the manufacturer’s guide).
6) As you removed everything, it’s time to connect them all back. Starting with the turbo intercooler, then the air intake system and finally the exhaust downpipe. Once you’ve triple-checked they are all connected properly to the new turbocharger, you’re nearly close to the finish line!
7) Furthermore, you should replace the oil feed pipe, the banjo bolts and copper washes which fit on either end of the pipe. They are inexpensive and its good practice. Your task now is to connect the oil feed pipe to the new turbocharger, but before you complete this job, to ensure that the turbo is not starting up without lubrication, it’s recommended to squeeze some engine oil into the turbo oil bay. After that, ensure the oil return pipe is connected properly and that it is clean and clear, with no blockages.
8) Finally, if you remember in the beginning, you flushed the oil and removed the old oil filter. Now, you can fit a brand new one in and also restock your vehicle with the correct grade of oil required for your engine.
9) After replacing a turbocharger, it’s important to do some checks. When you first start the engine and run the new turbocharger, you should avoid revving the engine. Instead, you should start it for around 10 seconds and then switch it off. Now check for any leaks, then give it a few moments before checking the oil level and topping it up if necessary. You can restart the vehicle, still ensuring you don’t rev, and allow the engine to idle as it reaches running temperature.
Our Services
 As with other engine problems, if you have any suspicions that your turbocharger is struggling or failing, you should diagnose the root cause of the issue and get it repaired as soon as possible. Putting off the problem will only increase the damage, and inevitably result in a costlier repair bill!
If you don’t feel confident enough with replacing a turbocharger yourself, at Sinspeed, we offer a specialised turbo rebuild service, which is carried out by our skilled team of turbo specialists. Not only will we diagnose the problem but we will also carry out the necessary repairs. Our remanufactured turbochargers come with a 2-year warranty, and for all turbo repairs, it’s a guarantee that we use new OE parts. Call Sinspeed today for a free quote and get your vehicle booked in!
Can i have a quote for a turbo charger for a insignia 2015 reg is fl15 mho
Please can i have proce for the turbo and insyalla please thank you kindly
2009 bmw 1 series 118d turbo broken oil leaking through exhust. what would the cost be to fix.
how much for a Vauxhall Zafira Tourer 1.4 Petrol Turbo.
Intermittent underboost problem