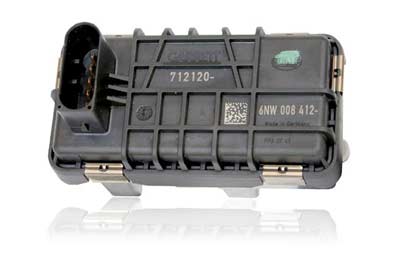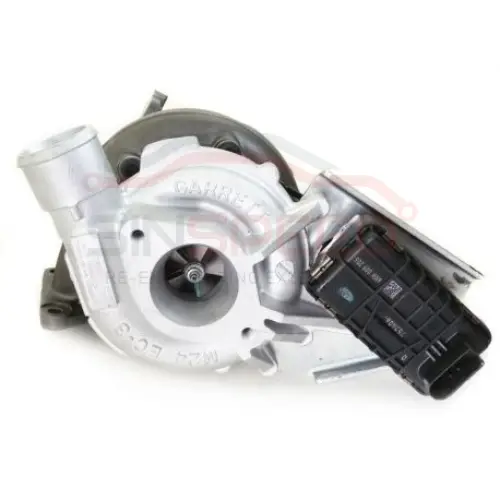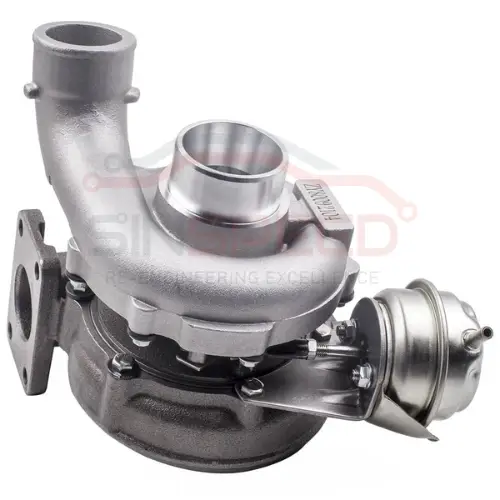
When a Fiat or Alfa Dualogic gearbox sticks in gear, refuses to pull away or slips into limp mode, the clutch actuator and its hydraulics are usually where the trouble starts. Dualogic is Marelli’s robotised manual — an ordinary clutch and gearbox shifted for you by an electro-hydraulic actuator — and we diagnose, rebuild and remanufacture that actuator on a mail-in basis, returning a bench-tested unit backed by a lifetime warranty.
What is the Fiat Dualogic gearbox — and is it any good?
Dualogic is Fiat’s (and Alfa Romeo’s) automated manual gearbox, developed with Marelli. Underneath it is an ordinary clutch and manual gearbox — no torque converter, no conventional automatic. A transmission control unit (TCU) commands an electro-hydraulic actuator that works the clutch and selects gears for you, automatically or through the lever. It was fitted to cars such as the Fiat 500, Panda, Punto and Grande Punto, the Doblo and the Alfa Romeo MiTo; the closely related system on rear-drive Alfas was badged Selespeed. It is light, efficient and shifts cleanly when healthy — but the actuator and its hydraulics wear with age, and that wear is what brings most of these cars in.
What is the actuator fault on a Fiat 500?
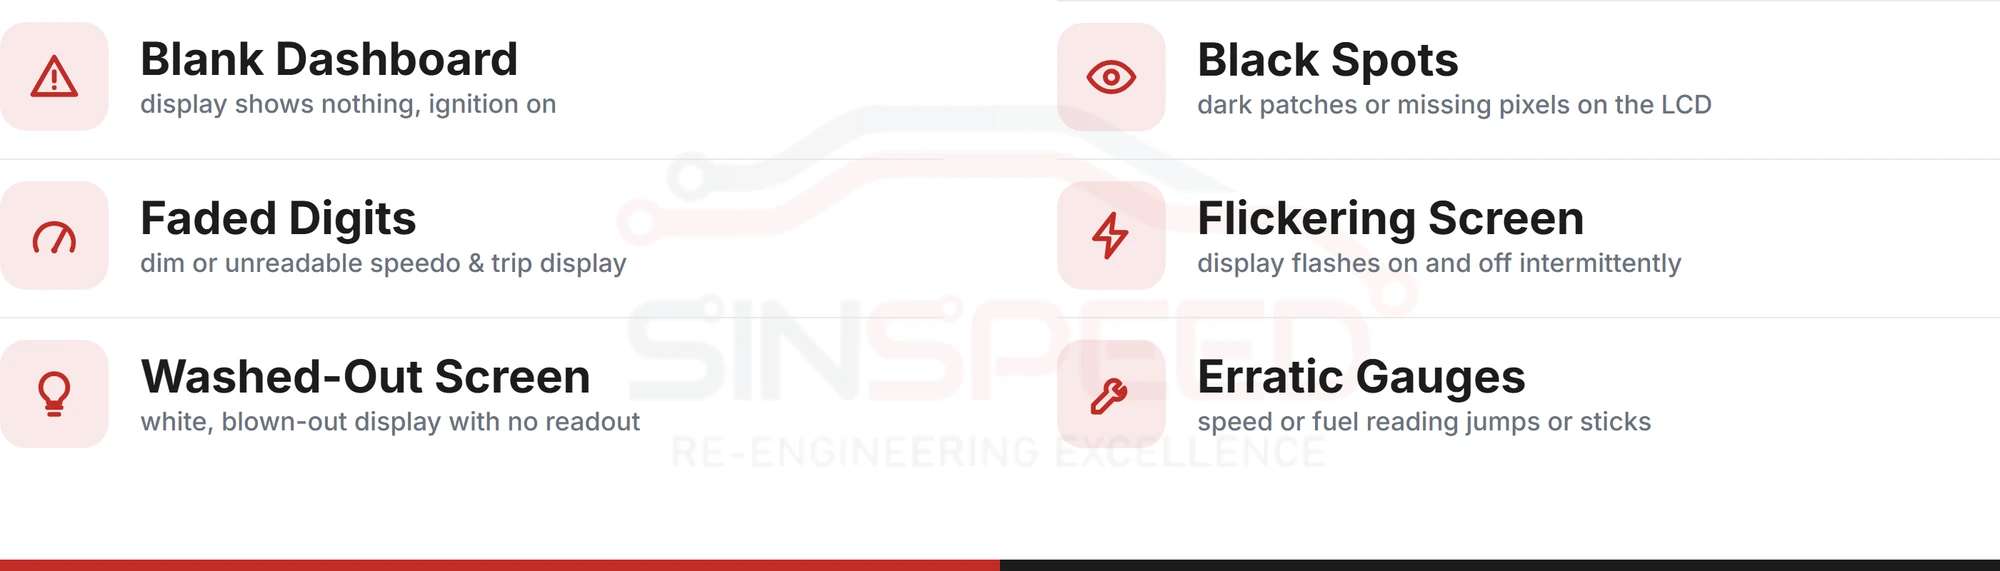
The classic Dualogic actuator fault is a car that suddenly won’t drive properly. Because the clutch is worked hydraulically, a loss of pressure tends to cause a sharp, total failure rather than a slow fade — fine one journey, stranded the next. The typical signs are:
Stuck in gear, stuck in reverse, or unable to select a gear at all
A gearbox warning light or a flashing gear display on the dashboard
The car dropping into limp mode, or refusing to pull away
Jerky, hesitant or slow gear changes that used to be smooth
A Dualogic in this state usually stores a gearbox fault code and drops into a protective mode — but that code points to a system, not always the failed part, which is why diagnosis has to come before any replacement.
What causes a Dualogic clutch actuator to fail?
Several parts of the Dualogic system produce the same symptoms, so pinning down the true cause matters before anything is changed. The usual causes are:
The clutch actuator itself — internal wear, worn seals or a failing solenoid inside the unit.
The electro-hydraulic power unit — the pump and pressure accumulator that build and hold the pressure the actuator relies on. Lose that pressure and the clutch can no longer be operated.
Clutch wear — a worn clutch moves the bite point away from where the system expects it, logging faults even when the electronics are sound.
TCU and sensor faults — when position or pressure sensors report inaccurate readings, the control unit can no longer judge clutch or gear position and limits drive to protect itself.
On higher-mileage cars more than one of these is often at play at once — a tired clutch alongside a worn actuator — which is exactly why fitting a single part on a hunch so often fails to fix the car.
Why a Dualogic actuator is a specialist repair, not a quick fix
Owner forums are full of Dualogic self-help — bleeding the hydraulics, forcing the gearbox to neutral on the selector shafts, or relearning the clutch point — and while those steps can get a stranded car moving briefly, they treat the symptom rather than the worn unit underneath. The actuator combines tight mechanical tolerances, a hydraulic circuit and control electronics that all have to be set and calibrated to work together. A part that has drifted out of specification is telling you something inside has worn, not that it simply needs nudging. On a gearbox that decides whether the car drives at all, guesswork can leave it in a worse state than before.
How Sinspeed repairs your Dualogic clutch actuator
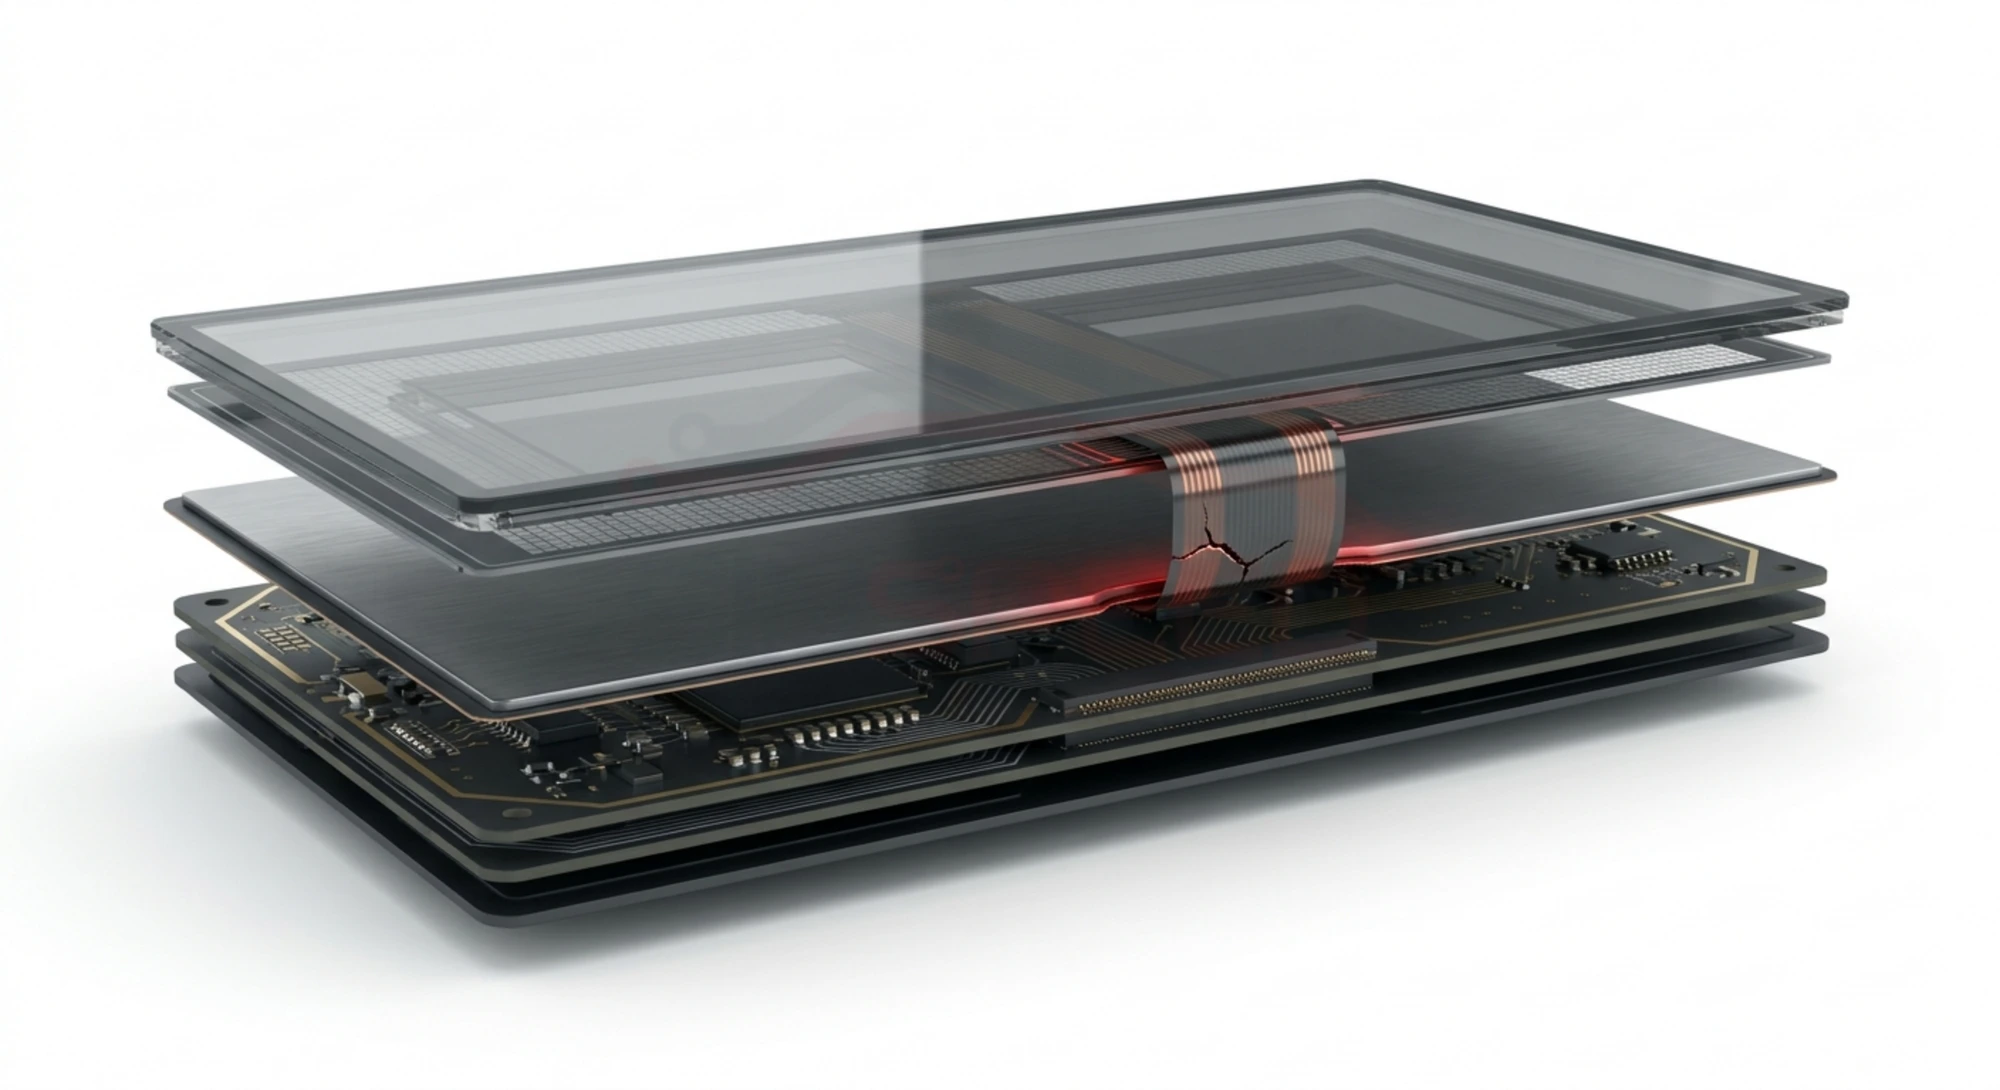
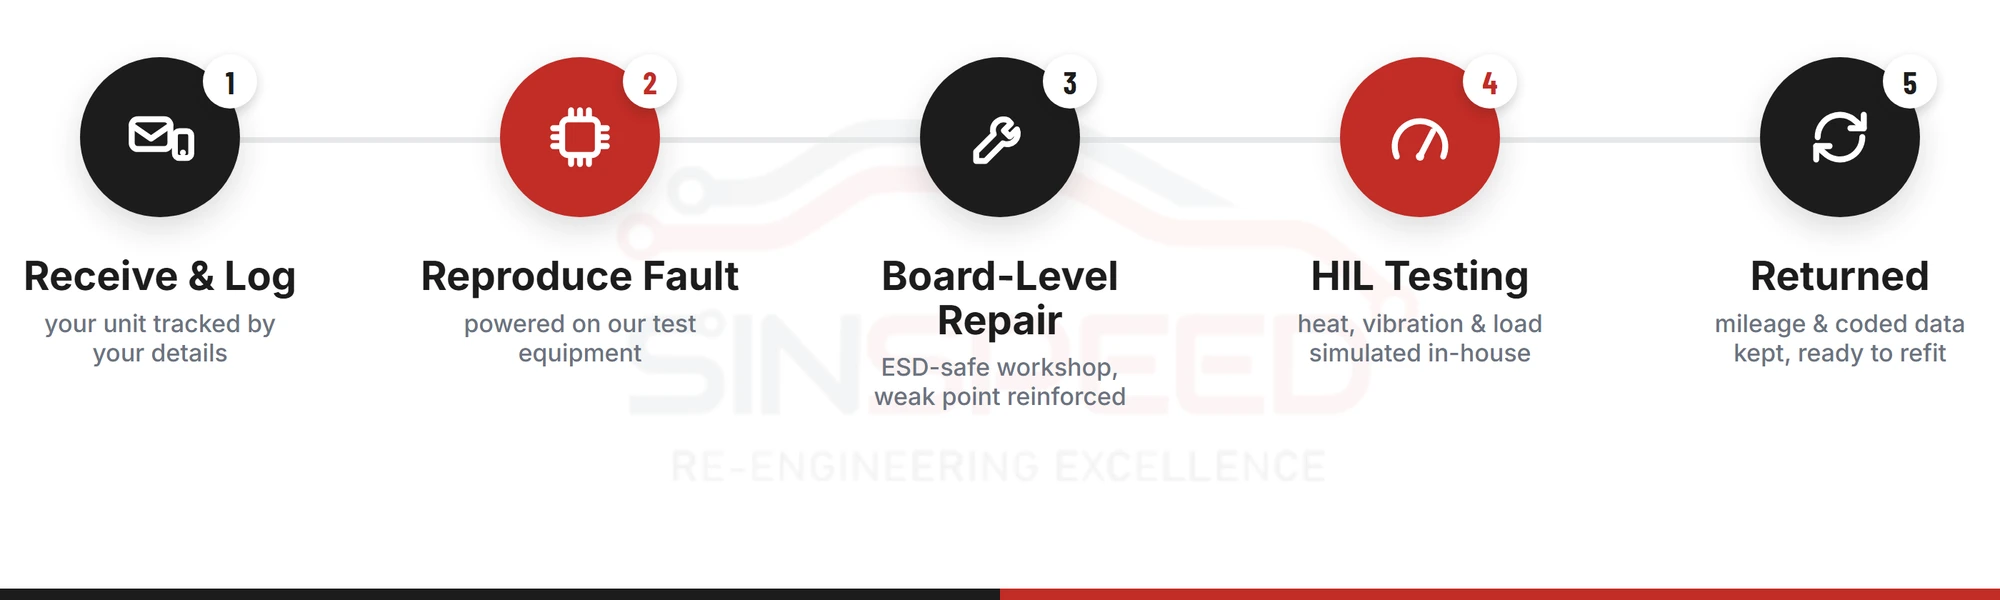
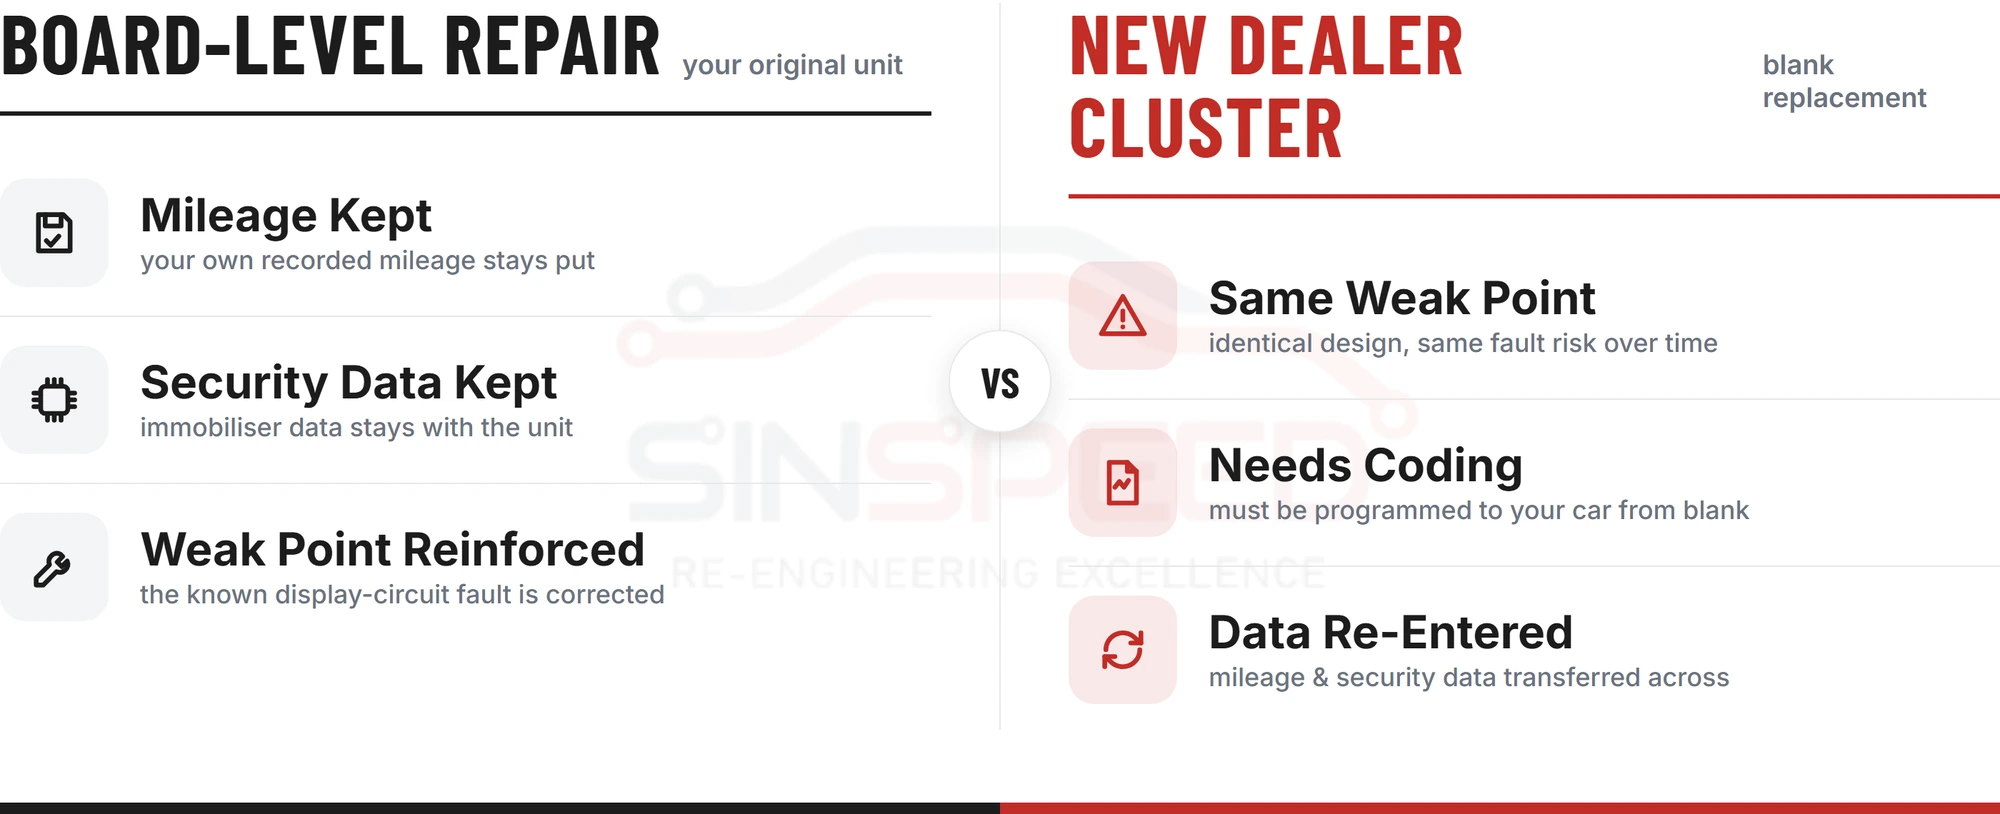
The Dualogic actuator is an electro-hydraulic unit, and repairing it properly takes both disciplines — which is why our in-house team pairs electronic specialists with hydraulic engineers working at component level. Rather than swap in a like-for-like replacement that carries the same original weak points, we strip your unit down, find the fault that actually caused the failure, and rebuild it, reinforcing the areas known to wear.
Every rebuilt actuator is calibrated with dealer-level diagnostic equipment and tested on our in-house Hardware-in-the-Loop rigs, which recreate the heat, vibration and load the unit meets in the car, before it is dispatched. Most units come back ready to fit, and our remanufactured parts carry a lifetime, unlimited-mileage warranty. This work sits within our wider clutch & gear actuator repairs across the makes and models that run a robotised gearbox.
The service is mail-in — you send us the failing unit and we repair and return it. Start by completing our repair form with your vehicle and the symptoms you’re seeing, and if you’re not yet sure the actuator is the culprit, get in touch and we’ll help you pin down the next step.
Frequently Asked Questions
Is the Fiat Dualogic gearbox any good?
As a design it is light, efficient and pleasant to drive when it is in good order. Its weak point is age-related wear in the clutch actuator and hydraulics, not the concept itself — and because the actuator can be remanufactured rather than replaced, a Dualogic fault is rarely a reason to give up on an otherwise sound car.
What is the actuator fault on a Fiat 500?
It is a failure in the electro-hydraulic clutch actuator, or in its hydraulic pressure supply, that leaves the car stuck in gear, unable to select a gear, jerky or in limp mode. It usually stores a gearbox fault code and needs proper diagnosis, because the same symptoms can also come from clutch wear or a faulty sensor.
Can a Dualogic clutch actuator be repaired instead of replaced?
In most cases, yes. We strip, rebuild and recalibrate the actuator rather than fit a new coded unit — reinforcing the known weak points during the rebuild and bench-testing it before it goes back to you.
Does the repaired actuator need coding when it’s refitted?
Many of our remanufactured units are returned ready to fit with no coding needed. Where a car does need a specific calibration, we carry it out before dispatch so the unit arrives set up correctly.
The Alfa Romeo Selespeed clutch actuator is the electro-hydraulic unit that operates the clutch on the 147, 156, GT and GTA robotised gearbox — and when it fails the car can stick in gear, refuse to move or drop into limp mode. We diagnose, rebuild and remanufacture the Selespeed clutch actuator on a mail-in basis, returning a bench-tested unit backed by a lifetime warranty.
Selespeed is Alfa Romeo’s robotised manual gearbox — a conventional clutch and manual gearbox operated electro-hydraulically rather than by a clutch pedal. There is no torque converter and no traditional automatic. Instead, a transmission control unit (TCU) commands an electro-hydraulic actuator that opens and closes the clutch and selects gears for you, either fully automatically or through the lever and paddles. It was fitted across models such as the Alfa 147, 156, GT and GTA. When it works, Selespeed delivers quick, clutchless shifts; when the clutch actuator or its hydraulics fail, that same design can leave the car unable to select a gear at all.
What are the common Selespeed clutch actuator symptoms?
Selespeed faults rarely present the same way twice, but a failing clutch actuator usually shows one or more of these signs:
The car won’t select a gear, or becomes stuck in gear or neutral
A flashing gear display or a warning light on the dashboard
The transmission dropping into limp mode, or the car failing to move at all
Harsh, slow or hesitant gear changes that were previously smooth
Because the clutch is operated hydraulically, a loss of pressure often causes a sudden, total failure rather than a gradual decline — the car can be driving normally one minute and refusing to pull away the next.
What causes an Alfa Romeo Selespeed clutch actuator to fail?
Several parts of the Selespeed system can produce the same symptoms, which is why proper diagnosis matters before anything is replaced. The usual culprits are:
The clutch (Selespeed) actuator itself — internal wear, seal failure or a faulty solenoid within the unit.
The electro-hydraulic power unit — the pump, pressure accumulator and hydraulic circuit that feed the actuator. Lose pressure here and the clutch can no longer be operated.
Position and pressure sensors — when these report inaccurate readings, the TCU can no longer judge clutch or gear position and drops the car into a protective limp state.
Clutch wear — a worn clutch shifts the bite point the system expects, triggering faults even when the electronics are sound.
Often more than one of these is involved at once, and replacing a single part on a hunch is how owners end up paying for components that were never the root cause.
Why Selespeed repair is a precision job, not a DIY adjustment
There is plenty of forum advice about adjusting the clutch rod or nudging the bite point on a 156 Selespeed, but a clutch that has drifted out of specification is normally a symptom of an underlying actuator, hydraulic or wear problem — not a fix in its own right. The Selespeed unit combines fine mechanical tolerances with hydraulics and control electronics, all of which have to be set and calibrated together. Getting it right takes accurate diagnosis, a full strip and rebuild, and calibration against the values the control unit actually expects. Guesswork on a safety-relevant transmission part risks leaving the car in a worse state than it started.
How Sinspeed repairs your Selespeed clutch actuator
We are automotive-electronics remanufacturers who work at component level on the electronic and hydraulic units that control modern gearboxes, and the Selespeed clutch actuator sits squarely within that expertise. Rather than fit a like-for-like replacement that carries the same original weak points, we strip your unit, diagnose the actual fault and rebuild it — reinforcing the areas known to fail.
Every repaired actuator is tested on our in-house Hardware-in-the-Loop rigs, which simulate the heat, vibration and load the unit faces in the car, before it is calibrated and dispatched. Most units come back ready to fit, and our remanufactured parts carry a lifetime, unlimited-mileage warranty. This is part of our wider clutch & gear actuator repairs across makes and models where the gearbox is run by electronic actuators.
The service is mail-in: you send us the failing unit and we repair and return it. To get started, complete our repair form with your vehicle and fault details — and if you’re not certain the actuator is to blame, get in touch and we’ll help you work out the next step.
Frequently Asked Questions
What is the Selespeed transmission on an Alfa Romeo?
It is Alfa Romeo’s automated manual gearbox — a normal clutch and manual gearbox operated by an electro-hydraulic actuator under electronic control, with no clutch pedal and no torque converter. It was fitted to models including the 147, 156, GT and GTA.
How much does it cost to fix a Selespeed clutch actuator?
It depends on the fault, but remanufacturing your existing unit is usually far more cost-effective than buying a new coded actuator — and it avoids fitting a fresh part with the same original design weakness. Complete our repair form and we’ll quote against your specific unit.
Can a Selespeed clutch actuator be repaired instead of replaced?
In most cases, yes. The actuator can be stripped, rebuilt and recalibrated rather than replaced outright. We reinforce the known weak points during the rebuild and bench-test the unit before it goes back to you.
Will the repaired actuator need coding when it’s refitted?
Many of our remanufactured units are returned ready to fit with no coding required. Where a specific calibration is needed, we carry it out before dispatch so the unit is set up correctly.
Summary: A DPF and EGR delete remap is an off-road-only service. The diesel particulate filter (DPF) and exhaust gas recirculation (EGR) system are physically removed, then the engine is given a custom remap matched to that exact vehicle so it runs correctly without them. The physical removal and smoke correction are carried out here, for vehicles used solely off the public road.
A diesel particulate filter traps soot from the exhaust before it leaves the tailpipe. The exhaust gas recirculation valve feeds a measured amount of exhaust gas back into the intake to lower combustion temperatures and cut nitrogen-oxide (NOx) emissions. Both are emissions-control parts, and both wear out — a DPF that clogs and will no longer regenerate, or an EGR valve caked with carbon that sticks. The usual result on the driver’s side is a warning light, limp mode and flat, hesitant running.
A delete remap goes further than a repair. The part is physically removed from the vehicle, and then the ECU is reprogrammed so it no longer expects that hardware to be present. This is the point most explanations skip: removing the part on its own leaves the ECU searching for sensor readings it can no longer see, which throws fault codes and usually drops the engine straight into limp mode. The remap is what makes the deleted configuration run cleanly — it is not an optional extra bolted on afterwards.
Because a vehicle with its DPF or EGR removed no longer meets the emissions standard it left the factory with, this is an off-road-only service. The legal position is set out in full further down this page.
Do you have to remap after an EGR or DPF delete?
Yes. A physical removal has to be matched by a change in the ECU software, and the two are really one job rather than two.
Take the DPF. The ECU runs periodic regeneration cycles that inject extra fuel to burn off trapped soot. Strip the filter out but leave the software alone and the ECU keeps commanding those regenerations into an exhaust that no longer has a filter — wasting fuel and, in time, causing further problems. It also monitors the pressure difference across the filter and the exhaust gas temperature; with the filter gone, those readings fall outside the expected range and the ECU logs faults. The remap disables the regeneration strategy, removes the differential-pressure and temperature checks tied to the filter, and clears the triggers that would otherwise light the dashboard.
The EGR is similar. The valve can be closed off with a blanking plate, but unless the ECU is told to stop commanding it, the control loop reports that the valve is not responding and raises a fault. The remap closes the valve in software so the ECU no longer expects it to move. In short, a physical delete without a proper remap is the classic reason a diesel runs worse afterwards, not better — the hardware change and the matching software change belong together.
What happens if you delete the EGR and DPF?
On a vehicle that has been correctly deleted and remapped, the day-to-day change is straightforward. There are no more DPF regeneration cycles, and none of the fuel they consume. Limp-mode events tied to a blocked filter or a sticking EGR valve stop happening. The intake tract stays cleaner, because exhaust gas is no longer being recirculated back over the inlet valves and manifold, so carbon build-up slows. Many drivers describe sharper throttle response.
We are straight about the trade-offs too, because they matter to the decision. A deleted vehicle emits more soot and NOx than it did from the factory — that is precisely why it is restricted to off-road use. It will also produce more visible exhaust smoke unless the fuelling is corrected as part of the map, which is exactly what smoke correction is for. And a delete on its own is not a performance upgrade: removing a filter does not add meaningful power. Any genuine gains come from a separate tuning stage, and are a different conversation from getting a failed emissions system out of the way on an off-road machine.
The legal position: DPF and EGR deletes on UK roads
We will be plain about this, once, rather than dressing it up. Removing or disabling a vehicle’s DPF or EGR means it no longer meets the emissions standard it was type-approved to. Using such a vehicle on a public road is the offence — the law targets road use of a non-compliant vehicle, not the workshop act of carrying out the work.
Since February 2014, a missing or tampered diesel particulate filter has been an automatic MOT failure. Penalties for using a non-compliant vehicle on the road can reach £1,000 for a car and £2,500 for a light goods vehicle. For those reasons, we supply delete remaps for off-road, motorsport, agricultural, plant and export vehicles only.
If your vehicle is used on the public road and you are dealing with a blocked or failing filter, deletion is the wrong route. The correct approach keeps the emissions system in place — DPF cleaning and smoke correction that restores the filter and corrects over-fuelling — which is covered in the next section.
Delete remap vs a road-legal remap: which route is yours?
Two very different jobs share the word “remap”, and confusing them leads people to the wrong service. A delete remap removes the emissions hardware and is off-road only. A road-legal remap leaves the DPF and EGR fully in place and working — it optimises fuelling and timing for economy or drivability without touching the emissions equipment, so the vehicle stays compliant and MOT-ready. Those economy and diesel remaps sit under our ECU remapping services.
And if the real problem is simply a blocked DPF on a road car, the answer is not deletion at all. It is cleaning or repair that brings the filter back to health. The table below sets out the three routes side by side so you can see which one fits your vehicle and how it is used.
Delete remap vs road-legal routes
Route
Emissions hardware
Suitable for
Road & MOT status
DPF / EGR delete + remap
Physically removed and deleted in the ECU
Off-road, motorsport, agricultural, plant and export vehicles
Not road-legal; automatic MOT failure
Road-legal economy / diesel remap
Kept and fully functional
Road-registered diesels wanting better economy or drivability
Road-legal; MOT-ready
DPF cleaning / smoke correction
Kept, cleaned and restored
Road cars with a blocked or over-sooting filter
Road-legal; MOT-ready
Where a road car has a genuinely failed filter, our DPF removal and smoke-correction service and the wider DPF repair options keep the vehicle compliant while solving the fault. Tell us how the vehicle is used and we will point you to the right one.
How we carry out a delete and remap
A delete is two pieces of work carried out together: the physical removal of the DPF or EGR hardware, and a custom remap matched to your exact vehicle so the engine runs correctly without it. The remap is matched to the specific vehicle rather than a generic, off-the-shelf file, because the DPF and EGR control strategy differs from one engine family to the next — a Ford 2.0 TDCi is not a BMW N47, and a careless, one-size-fits-all delete leaves latent fault triggers or over-fuelling behind.
The removal and the smoke correction are done here. Over-fuelling is what makes a badly deleted engine roll heavy black smoke; our smoke-correction work tunes the fuelling so a deleted engine burns cleanly instead. Before anything is changed we read and back up your vehicle’s original ECU file and keep that copy throughout, so the ECU can be returned to standard if the vehicle’s use ever changes. The hardware is removed and blanked correctly, the vehicle is checked over, and it is only handed back once it is running as it should.
To start, complete our online repair form with your vehicle details and the systems involved, or contact our team to talk it through first.
Why owners bring delete and remap work to us
A delete lives or dies on how carefully the job is carried out — the hardware removed properly, the fuelling corrected so the vehicle does not smoke, the remap matched to the exact vehicle, and your original ECU file kept safe. That is the work we take care of, and it is our core discipline.
Sinspeed is a UK automotive-electronics specialist. On a delete and remap, that means the physical removal is done here, the smoke correction is tuned so a deleted engine burns cleanly rather than rolling black smoke, a custom remap matched to your engine is arranged and applied, and a copy of your original file is kept on record so the ECU can be returned to standard later. It is the difference between an off-road diesel that runs clean and one that stumbles, over-fuels and buries fault codes for later. For road vehicles, we will always steer you toward the compliant route instead — honest advice about what your vehicle actually needs is part of the service, not a bolt-on.
DPF and EGR delete remap FAQs
Do you have to remap after an EGR delete?
Yes. Blanking or removing the EGR without a matching software change leaves the ECU expecting the valve to respond, which raises a fault and can trigger limp mode. The remap closes the valve in software so the engine runs correctly.
Does a DPF delete need a remap?
Yes. With the filter gone, the ECU still commands regeneration cycles and monitors filter pressure and temperature. The remap disables the regeneration strategy and removes the checks tied to the filter, so no fault codes are raised.
Will a delete remap pass an MOT?
No. Since February 2014 a missing or tampered DPF is an automatic MOT failure, which is why it is an off-road-only service — never for road use.
Can a delete remap be reversed?
Yes. We keep a copy of your original ECU file, so the vehicle can be returned to its standard software if its use changes. The physical parts would also need to be refitted to restore the emissions system.
Does deleting the DPF or EGR add power?
Not on its own. A delete clears failed emissions hardware and stops the running problems it causes, but it is not a performance upgrade. Meaningful power gains come from a separate tuning stage, which is a different job.
Will the vehicle smoke after a delete?
It can, if the fuelling is left uncorrected — that is what causes heavy black exhaust smoke. Our smoke-correction work tunes the fuelling as part of the map so a deleted engine burns cleanly.
Which vehicles is a delete remap suitable for?
Off-road vehicles only — machines used away from the public road. If your vehicle is road-registered, the correct route is DPF cleaning or repair that keeps the emissions system in place.
Final thoughts
A delete remap is a genuine fix for the right vehicle — an off-road diesel whose emissions hardware has failed and is not worth economically repairing. On a road car it is the wrong tool, and we will tell you so. Where a vehicle is used off the public road, a custom remap matched to the vehicle, with the fuelling corrected, is what separates an engine that runs clean from one that smokes and stumbles. Tell us the vehicle and how it is used, and we will advise the right route.
Summary: A diesel remap rewrites your engine’s ECU calibration to sharpen throttle response, lift low-down torque and improve fuel economy – without removing your DPF, EGR or any emissions hardware, so it stays road-legal. At Sinspeed the map is matched to your exact vehicle rather than a generic file, we install it safely through our mail-in or mobile service, and we keep your original ECU file on record so the change can always be reversed.
If your diesel feels flat off the mark, hangs on turbo lag before the boost arrives, or works noticeably harder when it is loaded or towing, the engine is almost certainly capable of more than the factory settings allow. A diesel remap addresses that directly. It is a rewrite of the software map inside your engine control unit – the ECU – and specifically the tables that decide how much fuel is injected, precisely when it is injected, and how much boost the turbocharger delivers across the rev range.
Every diesel leaves the production line with a deliberately conservative calibration. Manufacturers build in headroom to cope with poor-quality fuel, skipped services, extreme climates and a single global map that has to suit dozens of markets and driving styles. A remap reclaims that headroom on a vehicle you actually service and fuel properly. It sharpens throttle response and fills in the flat spots the factory map leaves behind, and it does all of that in software – without changing a single mechanical component on the engine.
That software-only nature is the whole point. Nothing is bolted on and nothing is removed; the pistons, injectors and turbo you already own simply work to a smarter set of instructions. For most owners the result is not about chasing a headline power figure. It is about a diesel that pulls cleanly from low revs, sits more relaxed on the motorway, and stops feeling like it is straining every time the road tilts uphill.
Why diesel engines respond so well to remapping
Turbo-diesel engines are unusually responsive to calibration changes, and the reason is in how they make power. A modern common-rail diesel meters fuel at extremely high pressure and can vary injection timing very precisely, while the turbocharger forces in the extra air needed to burn that fuel completely. The factory map keeps all three of those levers – fuelling, injection timing and boost – well inside the engine’s mechanical capability, which leaves a genuine, usable margin for a careful map to work with.
Torque is where the gains matter most. Diesels make their pull low in the rev range, which is exactly where you drive most of the time – pulling away in traffic, holding a gear on a motorway incline, or moving a fully loaded car with a caravan on the back. By raising the fuelling and boost targets sensibly and advancing injection timing only where the engine can take it, a remap lifts mid-range torque and makes the car feel stronger and more effortless, rather than simply faster at the very top end where a diesel spends little of its life.
There is also the matter of the artificial restrictions the factory map imposes. Many diesels carry a conservative torque limiter or an early boost taper that creates a frustrating flat spot between gears – the engine seems to ‘wake up’ and then hesitate. Easing those limits within the mechanical margin removes the flat spot, so power arrives smoothly and predictably instead of in a sudden lump. That smoother delivery is often what owners notice first, ahead of any change in outright pace.
Economy remap or performance remap: which is right for you?
Not every diesel owner wants the same thing from a remap, so the map is matched to your priority. Broadly there are two directions, and a well-developed calibration can blend the two rather than treating them as opposites.
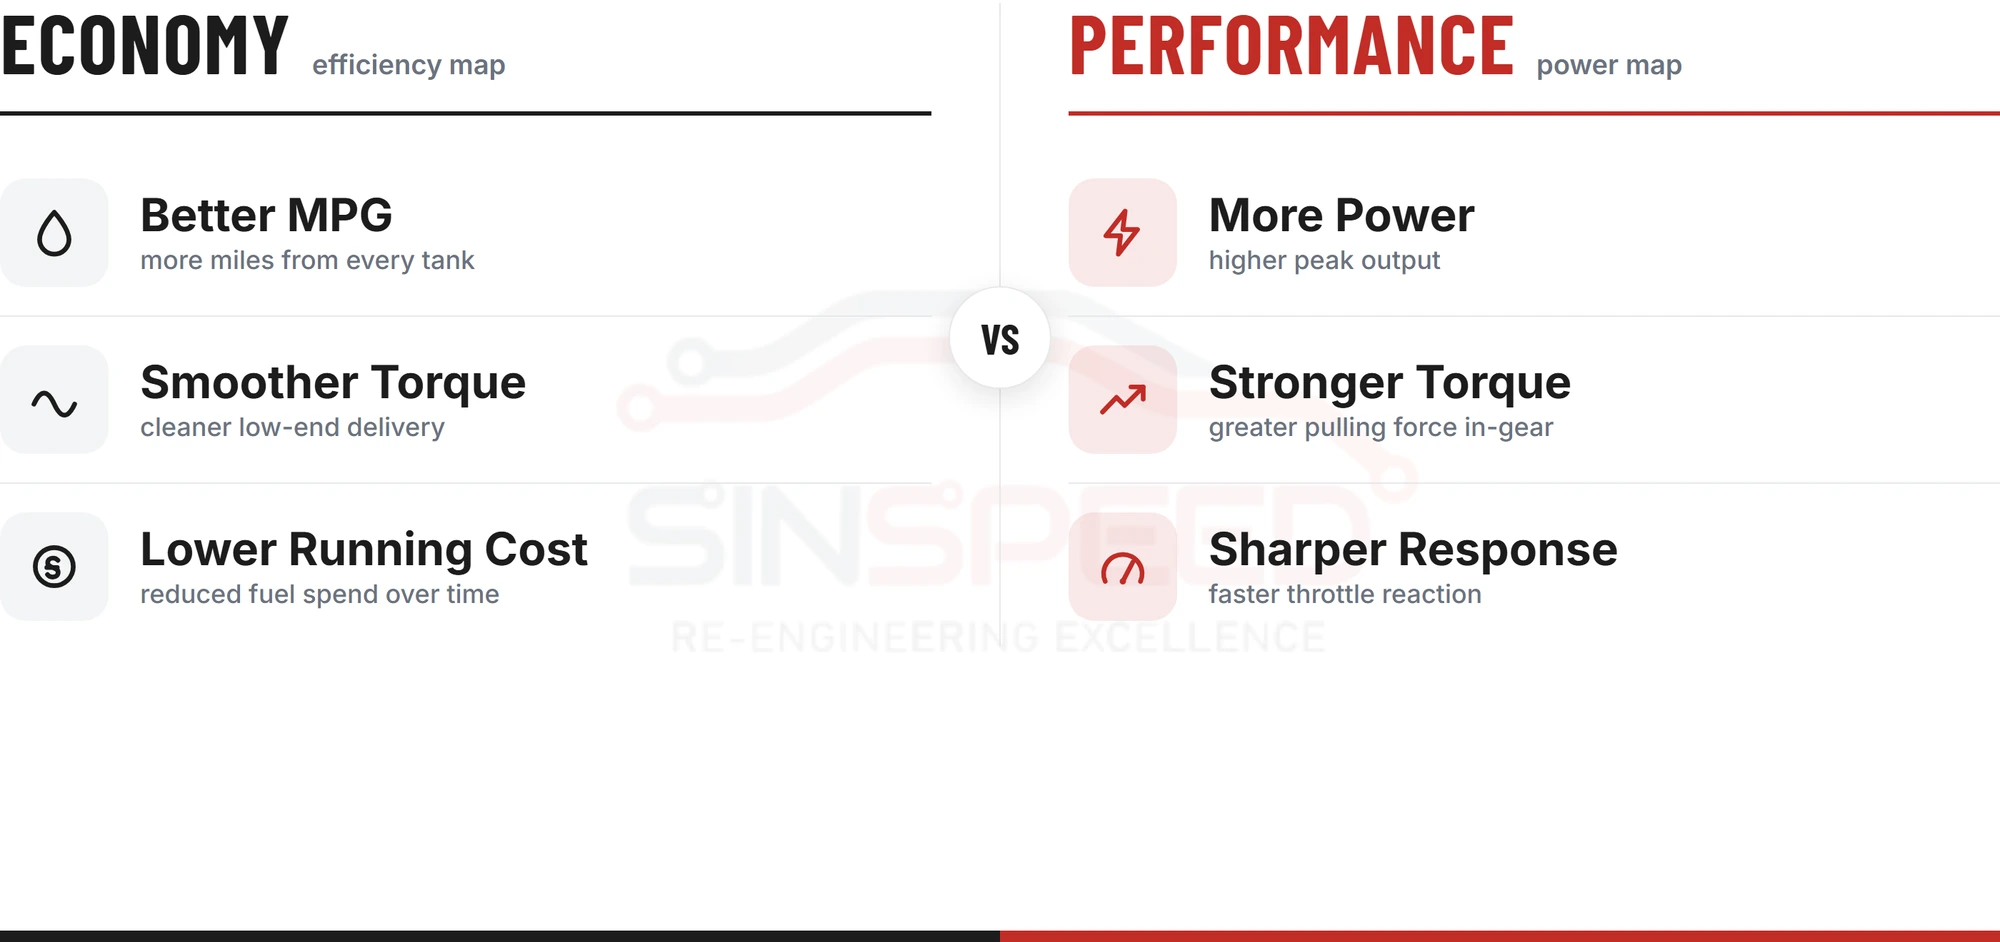
An economy-biased diesel map targets efficiency first. By improving low-rev torque, the engine pulls a taller gear more comfortably, so you change down less often and use less throttle to hold a steady speed. On a long-distance or high-mileage diesel that can translate into a real improvement in MPG over a tank, particularly for motorway commuters and drivers who cover big miles. If fuel returns are your main concern, our dedicated economy remap service is built specifically around that goal.
A performance or torque map prioritises drivability and pulling power – stronger overtaking, easier towing, sharper response from the throttle and a more confident feel when the car is loaded. In practice most diesel drivers benefit from a map that leans one way while still improving the other, because the extra low-down torque that makes a diesel quicker is the same torque that lets it cruise efficiently. The right balance depends on how you actually use the car, which is a conversation worth having before a map is chosen for your vehicle.
What a diesel remap changes, what you gain, and the trade-offs
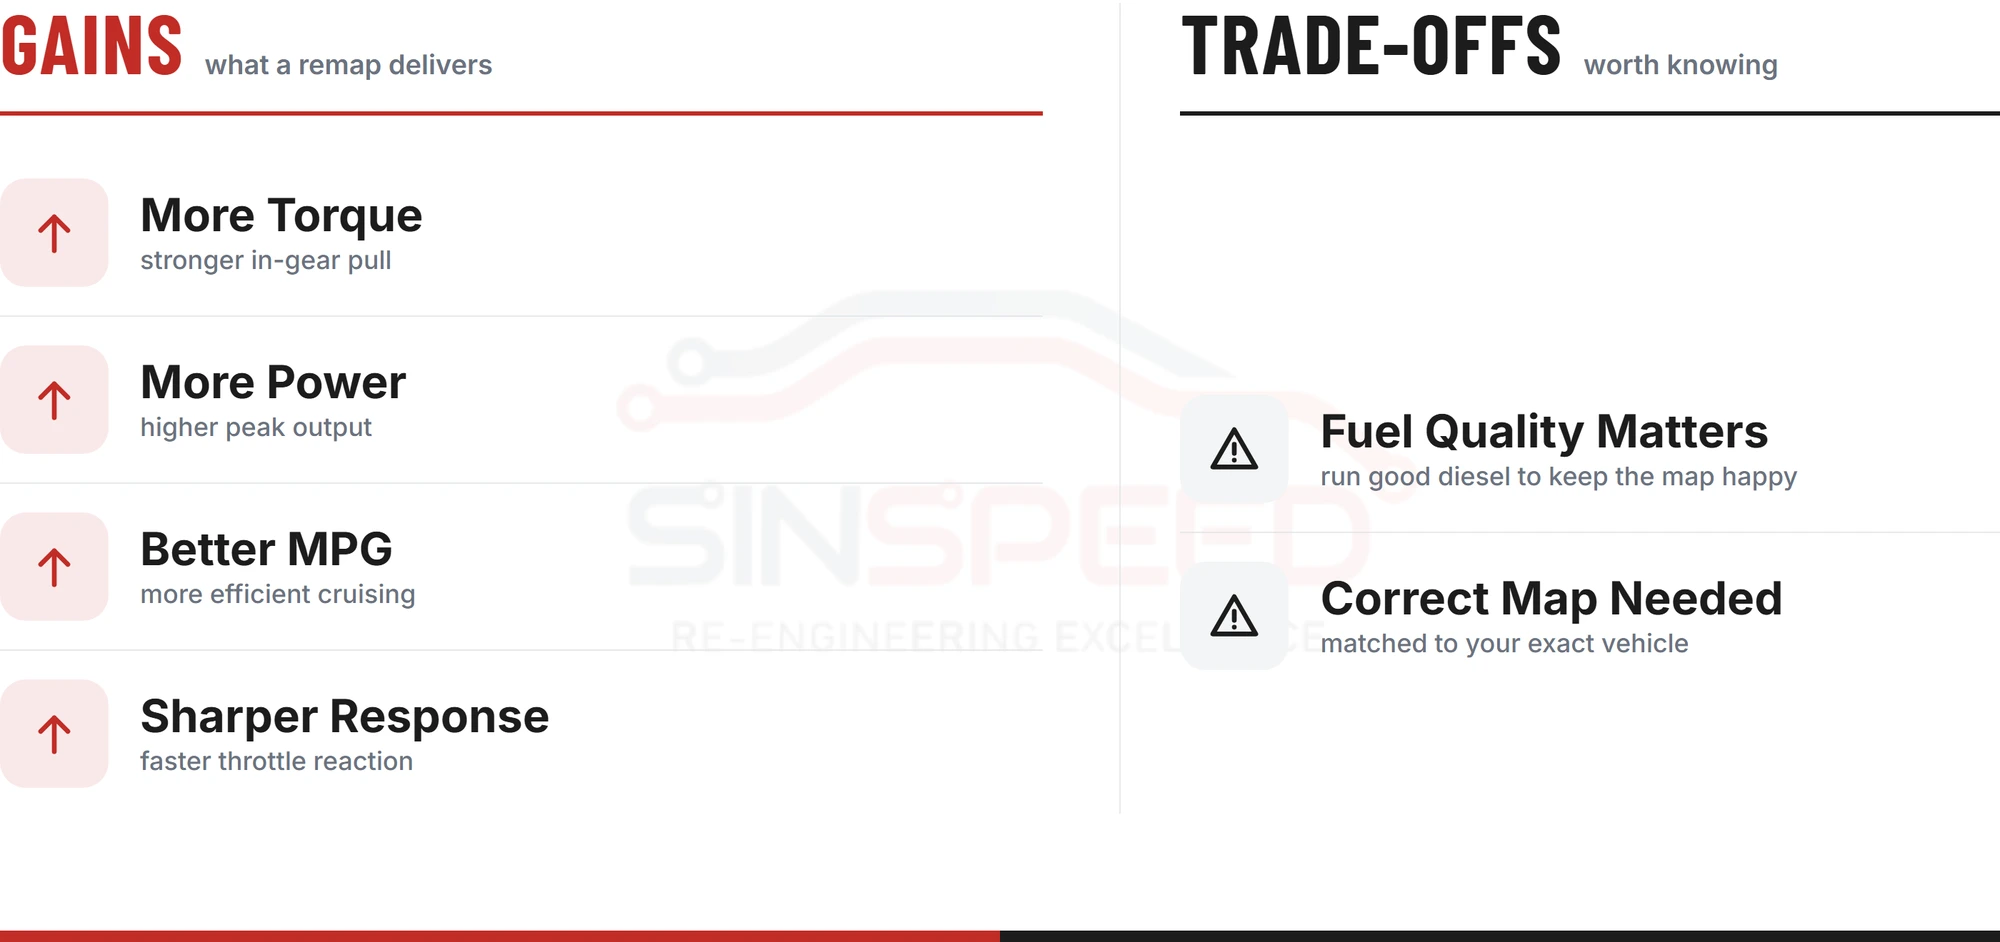
A remap is not a single dial that gets turned up. It is a set of coordinated changes to several calibration tables, each with a genuine gain and each with an honest limit. The table below sets out what a diesel remap recalibrates, what you stand to gain, and where a properly matched map deliberately stops.
What a diesel remap changes, what you gain, and the honest limit
What the remap recalibrates
What you gain
The honest limit
Fuelling (injected quantity)
More torque and a cleaner, more immediate throttle response
Raised only as far as the turbo can supply the matching air; over-fuelling causes smoke and excess heat, so a properly matched map does not chase it
Injection timing
Smoother combustion and improved efficiency
Advanced only where the specific engine tolerates it without knock or undue strain
Boost pressure and turbo targets
Stronger mid-range pull and reduced turbo lag
Kept within the standard turbocharger’s safe operating map
Torque limiters
Removes the artificial flat spots felt between gears
Set below the sensible limit of the clutch and dual-mass flywheel
Rev and speed governors (where applicable)
A more usable, less restricted rev range
Left at safe mechanical limits, never raised for the sake of a bigger number
The trade-offs are worth being straight about, because the competitor pages that rank for this term rarely mention them. A remap declared to your insurer may affect the cost of cover, and it should be declared. On an engine that is already tired, more torque can expose a worn clutch. And a map written too aggressively for the sake of headline figures will trade reliability for a number you cannot safely use. None of these are reasons to avoid a diesel remap – they are reasons to have it done properly, within limits, on an engine that is in good health.
Is a diesel remap road-legal?
Yes. A diesel remap of the kind described here changes only the engine’s software calibration. Your diesel particulate filter (DPF), exhaust gas recirculation (EGR) valve and the rest of the emissions system stay fitted and fully working, so the car remains road-legal and ready for its MOT. A well-written map that keeps the engine burning fuel cleanly can actually help a healthy DPF regenerate more predictably, because consistent, complete combustion is good for the whole exhaust after-treatment system rather than a strain on it.
Two practical points are worth making plainly. First, you should tell your insurer about any remap – it counts as a modification, and declaring it keeps your cover valid. It is a short phone call, not an obstacle. Second, keep a road-legal remap clearly separate in your mind from emissions-delete work: physically removing or disabling a DPF or EGR is a different, off-road and motorsport-only service that we handle separately, and a road-legal diesel remap does not remove or disable any emissions equipment on your car.
Will a remap harm my diesel engine?
A sensible remap should not shorten the life of a healthy diesel, and ‘sensible’ is the operative word. The gains come from headroom the manufacturer already built in – the engine is not being asked to do something it was never designed to handle. The risk in remapping comes almost entirely from over-aggressive files that chase headline numbers with no regard for the mechanical margin, and that is precisely the kind of map that has no place in a properly matched remap.
There are real limits that any responsible remap respects on every diesel. The turbocharger, clutch and dual-mass flywheel each have a sensible torque ceiling; push past it and you trade long-term reliability for a bigger figure on paper. On a high-mileage or already-worn diesel, a tired clutch may begin to slip once torque rises, which is why we will flag it honestly rather than press on regardless. It is also why we will confirm your engine is a sound candidate before any remap is applied – if it has an existing fault or a component near the end of its life, you hear about it first, not after.
How the Sinspeed diesel remap service works
Every diesel remap is matched to your specific vehicle – not a generic file pulled from a folder and flashed on regardless. It is a custom map developed for your exact engine, ECU variant and state of tune. Before it is applied we save your original factory calibration in full, so your vehicle can always be returned to standard if you ever need it – for a dealer service, a warranty visit or resale. Nothing we do is a one-way door.
Our role is the service around that map, and we take it seriously. We help you choose the right map for your engine and how you actually use the car, install it safely through our mail-in or mobile service, and keep your original file on record so the vehicle can be returned to standard whenever you need. We would always rather match a map to driveability and long-term reliability than to a peak figure the engine can never safely deploy – so if a remap is not the right answer for your vehicle’s condition, we will tell you straight rather than take the work. And once it is done, we are here for the aftercare if anything needs looking at.
To get started, send us your vehicle details through our online repair and enquiry form and we will confirm exactly what is available for your engine, or contact our team if you would rather talk it through first. A diesel remap is one part of our wider ECU remapping service – explore the hub to see the full range of tuning and calibration work we carry out.
Diesel remap FAQs
Will a diesel remap improve my MPG?
It can, particularly with an economy-biased map. Stronger low-down torque lets the engine pull a taller gear with less throttle, so you change down less and work the engine less to hold a steady speed. The real-world improvement depends on your engine and how you drive – a long-distance motorway diesel tends to see the clearest benefit, and we will not promise a fixed figure we cannot stand behind.
Can a diesel remap be reversed?
Yes. We store your original factory calibration before any remap is applied, so the vehicle can be returned to its standard map at any time – for a service, a warranty visit or when you sell the car. The remap is a change, not a permanent alteration you are stuck with.
Is my diesel suitable for remapping?
Modern common-rail turbo-diesels respond very well, because their fuelling, injection timing and boost are all electronically controlled. Naturally aspirated and very old diesels have far less to gain. Either way, we will confirm your engine is mechanically sound first; a remap is only worthwhile on an engine that is in good health to begin with.
Will a remap damage my turbo or DPF?
Not when it is done sensibly. A properly matched map keeps boost within the standard turbocharger’s safe operating range and never over-fuels the engine, so combustion stays clean. A healthy DPF is unaffected and can even regenerate more predictably behind a well-calibrated map. The damage people hear about comes from aggressive, poorly written files – not from careful tuning within limits.
How much power and torque will I gain?
It varies by engine, generation and state of tune, so we do not quote guaranteed figures up front. What we can say honestly is that the most useful gains on a diesel are in mid-range torque and drivability rather than peak headline power. Send us your vehicle details and we will tell you what is realistic and safe for your specific engine.
Does a remap affect my warranty or insurance?
A remap is a modification, so you should declare it to your insurer to keep your cover valid – a quick call, not a barrier. It can also affect a manufacturer’s powertrain warranty, which is one reason we keep your original file on record so the car can be returned to standard if needed. We would always rather you go in with the full picture.
Is a diesel remap legal to drive on the road?
Yes. A road-legal diesel remap changes only the software; your DPF, EGR and emissions equipment stay fitted and working, and the car remains MOT-ready. Physically removing or disabling emissions hardware is a separate, off-road-only service and is not part of a road-legal remap.
Final thoughts
A diesel remap is one of the few changes that improves how your car drives and how efficiently it runs at the same time, using capability the engine already has rather than parts you have to buy. The difference between a remap that lasts and one that causes problems is entirely in how it is matched – built for your exact engine, kept inside sensible mechanical limits, and applied only once the engine has been checked over properly. Done that way, on a road-legal map that keeps your emissions system fully intact, it is one of the most worthwhile things you can do for a diesel you rely on every day.
Watching the fuel gauge fall faster than it should on the daily commute — or running a diesel that labours every time it tows — is what brings most drivers to an economy remap. The idea is straightforward: instead of chasing peak power, the engine’s software is retuned to make the most of the fuel it already burns, so you reach the same road speeds using less throttle. Done properly, that means better MPG and a more relaxed drive; done carelessly, it means very little at all. At Sinspeed we supply a custom ECU remap matched to your specific vehicle and coded to the car, so the map suits your engine and the way you actually drive — not a generic file flashed onto thousands of different cars.
An economy remap is a rewrite of the software held on your car’s Engine Control Unit — the ECU — with fuel efficiency as the priority rather than outright power. Every modern petrol and diesel car leaves the factory with a single, conservative map that has to suit every market, every fuel grade and every owner, from the gentle motorway cruiser to the driver who never services the car. That built-in caution leaves genuine room to tailor the fuelling and timing to one specific engine.
An economy tune adjusts the fuel delivery, the ignition or injection timing, and the torque available lower in the rev range. The aim is to let the engine produce useful pulling power sooner, so it can hold a gear longer and turn fewer revolutions to do the same work. Small changes to how and when fuel is burned add up over a journey, because the engine spends less time working hard to get you moving.
Because the map is developed for your exact vehicle rather than lifted from an off-the-shelf template, the changes are matched to your engine and not to a whole model range. That distinction matters: a file written for an engine family is a compromise, whereas a map tailored to your specific car and engine reflects the vehicle in front of us.
How does an economy remap improve fuel economy?
Yes — a car can be tuned for better fuel economy, and the mechanism is honest and simple. Most real-world fuel is used accelerating and pulling away, not cruising at a steady speed. Every time you ask the engine to build speed, it has to move air and fuel to make torque, and the harder it has to work to make that torque, the more fuel it consumes doing it. An economy remap attacks that part of the equation directly.
The change happens in three linked areas. First, fuelling: the map trims the air-fuel ratio so the engine is neither running richer than it needs to nor leaving usable efficiency on the table. Second, timing — the ignition point on a petrol engine, or the injection timing and duration on a diesel — is optimised so combustion happens at the most efficient moment for that engine rather than at a cautious factory default. Third, and most important for economy, the torque curve is reshaped so more pulling power arrives lower down the rev range. When strong torque is available at 1,500 to 2,000 rpm instead of only higher up, you no longer have to rev the engine hard or drop a gear to keep pace. You press the pedal less to climb a hill, join a motorway or move off from a junction — and less pedal, at lower revs, means less fuel for the same result.
Diesel engines respond particularly well, and it is worth understanding why. A diesel makes its power through the amount and timing of fuel injected rather than by throttling airflow, so it has a naturally broad, torque-rich character that an economy map can sharpen without stressing the engine. Modern common-rail diesels also inject fuel at very high pressure in precisely controlled bursts, which gives a well-developed map fine control over efficiency low in the rev range — exactly where a daily driver or a loaded tow car actually spends its time. That is why the strongest, most consistent economy gains tend to come from diesels.
Petrol engines can gain too, but the picture is more nuanced. A naturally aspirated petrol has less spare efficiency to unlock, so improvements are usually modest. Small turbocharged petrol units — the downsized 1.0 to 1.4-litre engines common on modern cars — sit somewhere in between: there is useful low-down torque to be found, which can genuinely help around town and on the motorway, but the gains rarely match a diesel’s. We will always tell you honestly where your specific engine sits on that scale before you commit.
The size of the gain depends on the engine, its condition and its service history, and above all on how you drive. We are honest about this: there is no fixed figure we can promise every car, and any tuner quoting a guaranteed number for every vehicle is guessing. A clogged air filter, tired injectors or a car that is overdue a service will all blunt the result. What we can say is that a properly matched economy map — developed for your specific engine and coded to your car — gives the engine the best possible chance of returning better MPG on the journeys you already make.
Does a remapped car ever use more fuel?
It can — and understanding why is the key to getting real savings. The most common reason a remapped car returns worse economy is simple: the driver enjoys the extra response and drives harder. A performance-oriented map, or an economy map used with a heavier right foot, will burn more fuel, not less. The torque is there to be used; use it enthusiastically and any efficiency benefit disappears.
This is the single honest caveat every driver should hear before booking. An economy remap does not lower your fuel use on its own. It gives the engine the ability to do more with less, but that potential is only realised if you keep driving smoothly and let the extra low-down torque do the work at lower revs. Treat it as a performance upgrade and you will spend more at the pumps, not less.
Economy remap vs Stage 1: what is the difference?
The two tunes start from the same process but chase different goals. A Stage 1 remap is a performance map: it extracts the most power and torque a standard engine can safely handle on its factory hardware, and fuel economy is a possible side effect rather than the aim. An economy remap keeps power gains modest and deliberately targets efficiency and drivability — usable torque low down, smoother delivery and sharper part-throttle response.
There is overlap. A mild economy map often adds a little power, and a sensibly driven Stage 1 car can sometimes return similar or better MPG than standard, because it too needs less throttle to cruise. The real difference is priority and calibration, as the table below shows.
Aspect
Economy remap
Stage 1 (performance) remap
Primary goal
Fuel efficiency and drivability
Maximum safe power and torque
Power gain
Modest
Significant
Low-down torque
Raised, for relaxed cruising
Raised, for stronger acceleration
Throttle response
Sharper at part-throttle
Sharper throughout the range
Best suited to
Commuters, high-mileage diesels, tow cars
Enthusiast drivers wanting performance
Effect on MPG
Improved if driven smoothly
Can improve or worsen, depending on driving
Hardware needed
None — standard engine
In short, both are custom maps matched to the same vehicle; the economy version simply targets how much less fuel you can use rather than how much more power you can make.
Is an economy remap worth it, and who benefits most?
Whether an economy remap is worth it comes down to one thing more than any other: how you drive, and how far. The map changes what the engine is capable of, but you decide whether that capability is spent on saving fuel or on going faster. A driver who settles into the new low-down torque, changes up earlier and keeps revs low will see the benefit the map was built to deliver. A driver who treats the sharper response as an invitation to press on will not — and no honest tuner can change that. This is why we talk through your driving before recommending anything, rather than promising a number.
Distance matters just as much as style. An economy tune earns its keep through repetition: a small percentage improvement in MPG is barely noticeable on the odd short trip, but it compounds meaningfully across a high-mileage year of commuting. The more miles you cover at steady speeds, the more the map has to work with.
The vehicles that gain the most tend to be:
High-mileage diesel commuters, where even a small percentage improvement in MPG adds up over a lot of driving, and where the engine spends most of its life in the low-rev band an economy map targets.
Tow cars, caravans and horseboxes, where extra low-down torque means the engine labours less under load. Towing is where a good economy map really shows: the engine holds a higher gear on inclines instead of dropping down and revving hard, so it pulls the weight more calmly and burns less fuel doing it — and the drive is simply more relaxed.
Vans and light commercials working long motorway routes, where smoother, more efficient delivery reduces driver fatigue as well as fuel use, and where the vehicle is often loaded and asking the engine to work.
Motorway and dual-carriageway drivers benefit for a similar reason: steady, sustained cruising is exactly the condition where reshaped torque and optimised fuelling let the engine hold speed with less effort. By contrast, for a car that only does short, low-mileage town trips from cold, or one driven hard for the fun of it, the case is weaker — the potential is there, but it is easily undone, and a cold engine on a two-mile school run never reaches the conditions where the map helps most.
We would rather tell you that honestly than sell a map that will not pay you back in the way you expect. If you are unsure whether your vehicle and driving style suit an economy tune, get in touch with the details and we will give you a straight answer before you commit to anything.
Is an economy remap legal, and what about insurance?
An economy remap is entirely road-legal in the UK. Remapping a standard engine for efficiency and drivability is a recognised, legitimate modification — you are optimising how the engine runs, not defeating any emissions or safety system. This page is about a clean, road-legal economy tune; it is not about emissions-equipment changes, which are a separate matter entirely.
There is one piece of good practice worth following: let your insurer know you have had the car remapped. Most modifications should be declared, and a quick call keeps your cover valid and avoids any dispute later. Beyond that, an economy remap leaves your car fully usable on the road exactly as it was before — just tuned to make better use of the fuel it burns.
Why choose Sinspeed for your economy remap
What separates a remap that delivers from one that disappoints is how well it is matched to your car and how it is fitted and supported. We do not flash a generic, off-the-shelf file downloaded for your engine family. Every economy remap we supply is a custom map matched to your exact make, model and engine, and coded to the car so it suits the vehicle in front of us rather than a whole model range.
Our role is to get the right map onto your car safely and to stand behind it. We guide you to the economy map that suits how and where you actually drive, handle the fitting properly through our mail-in and mobile service, and keep a copy of your original factory ECU file so the car can always be returned to standard if you ever want it — the change is reversible. Nothing is rushed, and the vehicle is checked before it goes back to you.
If a query comes up afterwards, you are dealing with the people who looked after your car, not an anonymous call centre, and our aftercare and support stay with you once the work is done. To get started, complete our repair and enquiry form with your make, model and engine, and we will confirm what is realistically achievable for your specific car.
Economy remap FAQs
Does an economy remap actually give better MPG?
It can, and it does for many drivers — but only if you let it. The remap raises low-down torque so the engine needs less throttle for the same journey, which lowers fuel use. Drive smoothly and you should see the benefit; drive harder to enjoy the extra response and any saving is cancelled out.
Does eco mode give you more MPG, and is it the same as an economy remap?
They are not the same. Eco mode is a factory driving setting that softens the throttle and shift points within the standard map. An economy remap rewrites the underlying ECU software itself, retuning fuelling, timing and torque delivery — a deeper, permanent change rather than a temporary setting.
What is the difference between a Stage 1 and an economy remap?
A Stage 1 remap targets the most power and torque the standard engine can safely make. An economy remap keeps power gains modest and prioritises efficiency and drivability — usable torque low down and smoother delivery, so you use less throttle day to day.
Does a remapped car use more fuel?
Only if it is mapped for performance or driven harder afterwards. A performance map, or an economy map used with an enthusiastic right foot, will use more fuel. An economy map driven smoothly is designed to do the opposite.
Is an economy remap legal in the UK?
Yes. Remapping a standard engine for economy and drivability is a legitimate, road-legal modification. You should, however, declare it to your insurer as you would any modification to the vehicle.
Which vehicles benefit most from an economy remap?
High-mileage diesels, tow cars and hard-working vans tend to gain the most, because they spend time under load where extra low-down torque reduces the effort — and the fuel — needed to do the work.
Final thoughts
An economy remap is one of the few upgrades that asks the engine to work smarter rather than harder — and when it is properly matched to your specific vehicle, it can make a diesel commuter or a tow car noticeably more relaxed and more efficient to live with. The honest truth is that the result depends as much on how you drive as on the map itself: the savings are there to be had, but only if you let the extra low-down torque do the work. If that fits how you use your car, a custom economy tune is well worth considering. Tell us your make, model and engine through our repair and enquiry form or get in touch, and we will tell you honestly what your vehicle can achieve.
A Volkswagen that has dropped one xenon headlight — the driver’s side dark while the passenger side still fires, or a dashboard warning and an AFS fault logged after the beam stopped swivelling — is rarely a dead bulb. On the Golf, Passat, Touareg and their VAG siblings the fault usually sits in the Bi-Xenon control module mounted to the back of the headlamp, not in the lamp itself. That distinction matters, because a main dealer will often quote for a complete headlight assembly when the electronics inside it can be repaired. We fix the original module at board level and return it working, tested and coded to your car.
What the VW xenon headlight control module actually does
VW xenon systems stack several parts that people lump together as “the headlight”. Keeping them distinct is the first step to a correct diagnosis — and to not spending money in the wrong place. Four components do the work behind a VW xenon lamp:
• The Bi-Xenon control module (the AL control unit) — the small circuit board, frequently made by Automotive Lighting (AL), mounted on or inside the headlamp. It powers the xenon system, drives the projector shield solenoid that switches a single xenon bulb between dipped and main beam, manages auto-levelling and, on adaptive cars, controls the cornering stepper motors. • The xenon ballast (HID control unit) — steps voltage up sharply to strike and then sustain the arc inside a gas-discharge (D1S, D2S, D3S or D4S) bulb. • The igniter — delivers the initial high-voltage pulse that “strikes” the arc; on some designs it is built into the ballast or the bulb base. • The AFS module — on Adaptive Front-lighting cars, swivels the beam in response to steering angle and road speed.
A failure in any one of these produces similar symptoms on the road, which is exactly why swapping a bulb, then a ballast, then a whole headlamp becomes such an expensive way to find the real fault. Getting the diagnosis right first is what keeps the repair cheap.
Signs your VW headlight control module has failed
You can usually tell a control-module fault from a simple bulb failure by the pattern of what is happening. Typical VW symptoms include:
• One headlight completely dead while the other works normally • A xenon light that flickers, strobes or glows pink or purple, then cuts out • Dipped beam working but main (bi-xenon) beam not switching, or the reverse • Auto-levelling stuck, aiming too high or too low, with a levelling fault stored • Adaptive or cornering beam that no longer swivels, with an AFS warning lit • A daytime running light (DRL) or LED strip out on one side only • A headlight range control or “Fault: right/left headlight” message on the dash
A useful field test is to swap the suspect module across to the opposite headlamp: if the fault follows the module to the other side, the module — not the lamp, the bulb or the wiring — is the culprit. If the fault stays put, the problem is elsewhere in that lamp. Either way, the pattern points you to the failed part before anyone spends a penny on replacement.
VW headlight module symptoms and likely causes
The table below maps the symptoms we see most often on VW xenon headlamps to their likely cause and what our repair involves. It is a guide to the diagnosis, not a substitute for one — we confirm the fault on the bench before any work is charged.
Symptom
Likely cause
What we do
One side dead, no flicker
Failed Bi-Xenon control module — internal power-stage failure
Board-level repair and reinforcement of the power stage
Flicker, pink glow, then cut-out
Ageing ballast or igniter, or an internal control-module fault
Test ballast and module under load; repair or remanufacture the failed part
Main (bi-xenon) beam will not switch
Projector shield solenoid driver fault in the control module
Rebuild the driver circuit and retest shield operation
Cornering beam not swivelling, AFS light on
AFS control fault or stepper-motor driver failure
Diagnose the AFS module and repair the drive circuitry
Auto-levelling error stored
Levelling driver or sensor circuit in the module
Repair the levelling stage and recalibrate
DRL or LED strip out on one side
LED driver stage in the module
Board-level driver repair
Misting or water, then an electrical fault
Water ingress into the control module
Repair the water-damaged board and advise on the lens or seal
Which VW and VAG models we repair
Because the Volkswagen Audi Group shares lighting hardware across its marques, the same Automotive Lighting Bi-Xenon control modules turn up on a wide spread of cars. We repair VW xenon headlight electronics across the range, including:
• Golf (Mk5, Mk6 and Mk7 / Mk7.5), including Golf GTI and Golf R • Passat and CC • Touareg and Tiguan • Scirocco, Polo, Jetta and Sharan
The same AL modules — and the coding behind them — are shared with Audi, SEAT and Škoda, so if your car uses the same control unit under a different badge, we can very likely help with that too. The page is VW-led because that is where most of these enquiries start, but the underlying electronics are common across the VAG ecosystem. If you are not sure which module your car has, send us the part number or a clear photo through the repair form and we will confirm it before you post anything in.
Repair or replace? The cost reality behind a VW xenon headlight
Genuine VW xenon headlamps are expensive. A complete Bi-Xenon assembly for a Golf or Passat routinely runs into four figures once VAT is added, and dealer repairs that bundle a new headlamp, a levelling module and calibration have been quoted at well over £1,000. Some owners abroad have reported bills around the $2,500 mark to put right a single bi-xenon headlight. Much of that figure is the assembly and the labour to fit and calibrate it — not the small control module that has actually failed.
Repairing the original module changes the arithmetic. Because we fix the electronics at board level and return the same unit, there is no new headlamp to buy and, in most cases, no dealer recoding to pay for on top. Just as importantly, we reinforce the known weak points during the repair rather than refitting a part that carries the same design flaw that caused the failure in the first place — so the fix is built to last, not to fail again the same way. We frame this in mechanical terms, not savings: the point is that the part that failed is usually far smaller than the assembly you have been quoted to replace.
Do VW headlight control modules need coding?
On VAG cars, coding matters. Many headlight control and AFS modules are married to the car and store adaptation data, so a blank replacement bought online will often throw a fault or simply refuse to work until it has been coded to your VIN on dealer-level equipment. That coding step is one of the biggest hidden costs of the do-it-yourself replacement route — people buy the part, fit it, and then find it still will not function.
Because we repair your original module, its coding and adaptations are preserved: it goes back into the car exactly as it came out. Where a unit genuinely does need programming or recalibration, we carry that out in-house on dealer-level diagnostic tools and return it ready to fit, so it works the moment it is plugged back in. You do not need a separate trip to a dealer to make a repaired module live again.
Cracked lenses, misting and water ingress
Not every VW headlight fault starts as an electrical one. Cracked lenses, failed seals and clouded polycarbonate let moisture into the headlamp, and that trapped water is often what eventually corrodes the control module’s circuit board. If your lamp mists up on cold mornings or has visible cracks in the lens, the electronics behind it are living on borrowed time — the fault code you see today may be the result of damp that got in months ago.
When a module reaches us with corrosion damage, we clean and repair the affected tracks wherever the board can still be saved, and we will tell you honestly if ingress has gone too far — along with what needs to change on the lamp or the seal to stop it happening again. It is worth remembering that a headlamp which does not light correctly is an MOT failure, so this is a road-safety and legal issue, not a cosmetic one.
How our mail-in VW headlight module repair works
Our repair-and-return model is built around you sending us the failing unit, so you do not need to be near our workshop to use us. The journey is straightforward:
1. Tell us the symptoms and your VW’s details through the repair form, and we confirm the module and the likely fault before you post anything. 2. You remove and send us the control module — or the whole headlamp where the module is integrated — to our workshop. 3. We diagnose it, test it under simulated heat, vibration and electrical load, and carry out board-level repair on the failed circuitry. 4. We program or recalibrate the unit where needed on dealer-level kit, then return it to you ready to fit.
Start the process on our repair form, or contact us first if you would rather check your specific module before sending it in. Either route puts your enquiry straight in front of the engineers who will do the work.
To get your VW headlight module sorted, send us the details through our repair form, or contact us to talk it through first.
Why choose Sinspeed for VW headlight electronics
VW xenon lighting is exactly the kind of embedded electronics we specialise in. We are a UK automotive-electronics remanufacturer with an in-house team of engineers doing circuit-level board repair — not board swapping — on modules like the Automotive Lighting Bi-Xenon control units used right across the VAG range. Familiarity with those specific AL modules, and with how VW codes them to the car, is what lets us return a repaired unit that simply works when it goes back in.
Every repair is carried out in a cleanroom-standard, ESD-safe workshop and tested on bespoke Hardware-in-the-Loop rigs that simulate the real heat, vibration and electrical load a headlight module sees on the car — so a unit that passes on the bench also holds up in service, not just for the first week. We program and calibrate on dealer-level tools, and most remanufactured units carry a lifetime, unlimited-mileage warranty. Garages, independent workshops and private VW owners across the UK send us this work, which tells you the repair stands up to the scrutiny of people who do it for a living.
For the wider picture on how these units fail and are rebuilt, our headlight control module repair hub covers the whole category across makes; this page is the VW-specific corner of it.
This VW service is part of our wider headlight control module repair work, covering xenon, LED and adaptive lighting faults across many makes.
VW headlight control module repair FAQs
Can a VW headlight control module be repaired?
Yes. Most VW Bi-Xenon and AFS faults are inside the control module — in the power and driver stages — which we repair at board level rather than replacing the whole unit or the headlamp. We repair your original module and reinforce the known weak points so the same fault is less likely to return.
How do I know if my VW headlight control module is bad?
The tell-tale signs are one headlight dead while the other works, flickering or a pink glow that cuts out, main beam that will not switch, auto-levelling or AFS faults on the dash, or a DRL out on one side. A quick check is to swap the module to the other headlamp: if the fault moves with it, the module is at fault.
Is bi-xenon a type of headlight?
Bi-Xenon describes a xenon (HID gas-discharge) headlamp that uses a single xenon bulb for both dipped and main beam, with a moving shield inside the projector to switch between them. It is different from a standard xenon lamp that uses xenon only for dipped beam, and the control module that drives that shield is a common VW failure point.
How much does it cost to replace a VW Golf headlight?
A complete genuine VW xenon headlamp assembly for a Golf typically runs into four figures once fitting and calibration are added, which is why repairing the small control module inside it is so often the sensible route. We frame the case on the mechanics: the part that actually failed is usually far smaller than the whole assembly a dealer quotes to replace.
Do I need to code a repaired VW headlight module?
Not when we repair your original unit — its coding and adaptations are preserved, so it goes back exactly as it came out. Where a module does need programming or calibration, we do it in-house on dealer-level equipment and return it ready to fit, so you avoid a separate dealer visit.
Can xenon headlights be repaired?
The electronics behind them very often can. Xenon faults usually trace to the control module, ballast or igniter rather than the lamp housing itself, and those are the parts we diagnose and repair. Where the housing has cracked or misted and let water in, we can repair the corroded board and advise on the lens or seal to stop it recurring.
Which VW models do you cover?
We cover VW xenon headlight electronics across the Golf, Passat, CC, Touareg, Tiguan, Scirocco, Polo, Jetta and Sharan, among others. Because the same Automotive Lighting modules are shared across VAG, we can also help with the equivalent Audi, SEAT and Škoda units. Send us the part number or a photo through the repair form if you are unsure.
Final thoughts
A dead or flickering xenon headlight on a Volkswagen is far more often a control-module fault than a failed lamp — and replacing the whole headlamp to fix a small board is an expensive way to solve it. Because the Bi-Xenon and AFS modules used across the VAG range are repairable at board level and can be returned coded to your car, the original unit is usually worth saving rather than scrapping. If you are staring at a four-figure dealer quote for a single headlight, it is worth having the module diagnosed first — the fault is often in a part far smaller, and far cheaper to put right, than the whole assembly you have been quoted for.
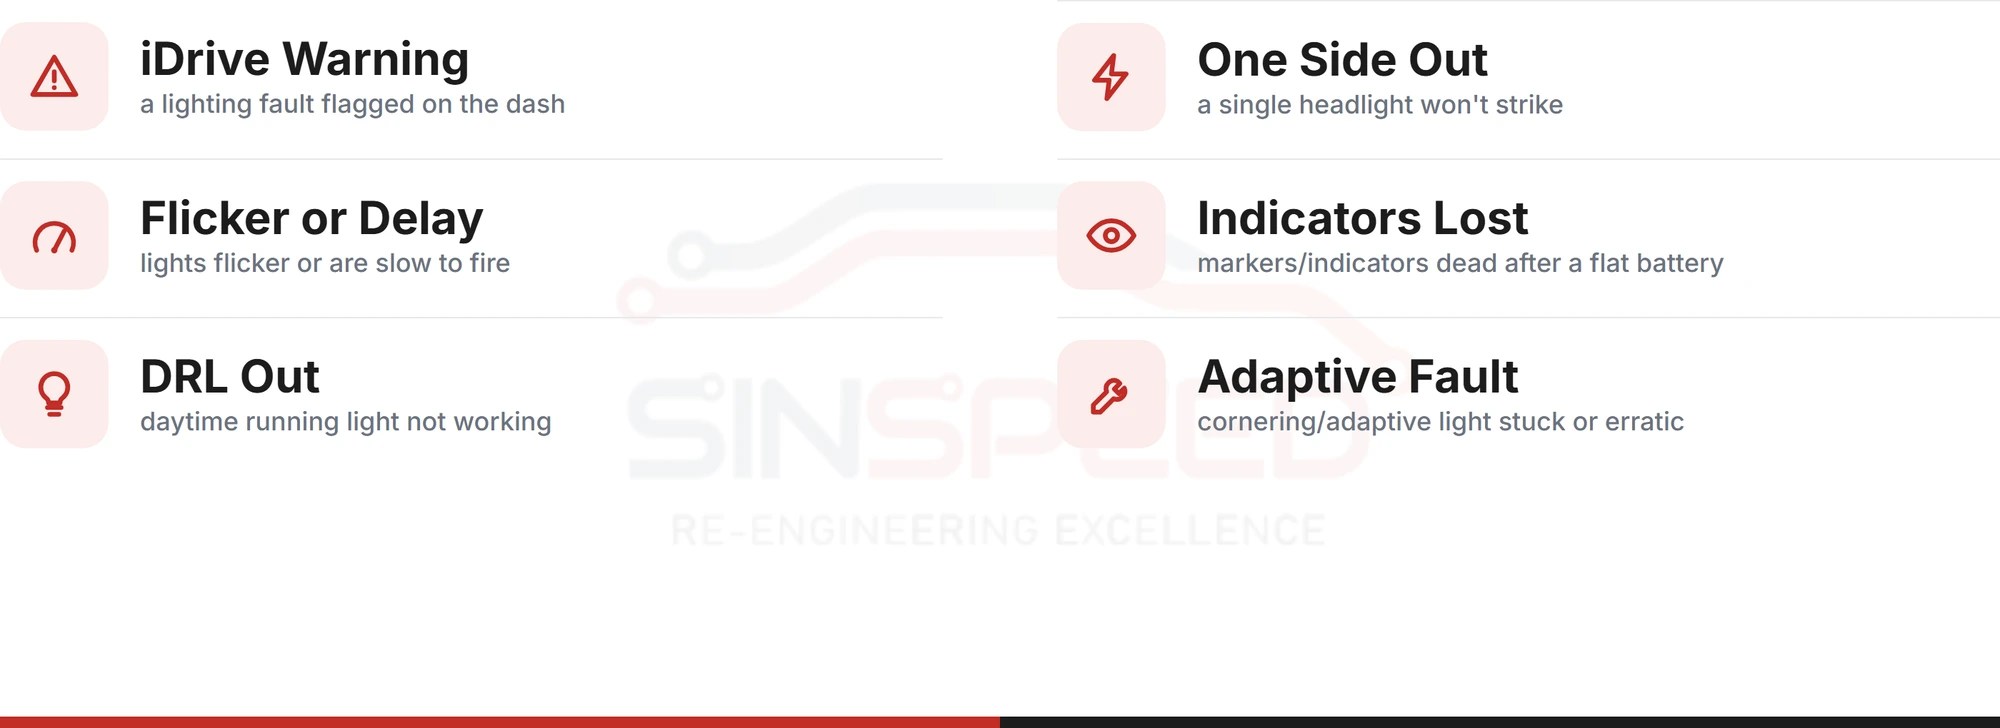
A BMW xenon or adaptive headlight that flags a malfunction on the iDrive, drops one side, or loses its indicators after a flat battery is almost always an electronics fault — the xenon ballast, the Light Control Module (LCM) or the Footwell Module (FRM), not the bulb or the whole headlamp. Sinspeed diagnoses and repairs these BMW lighting modules at circuit-board level, recovers and codes them to your car, and returns your own unit ready to fit with a lifetime warranty on the reman.
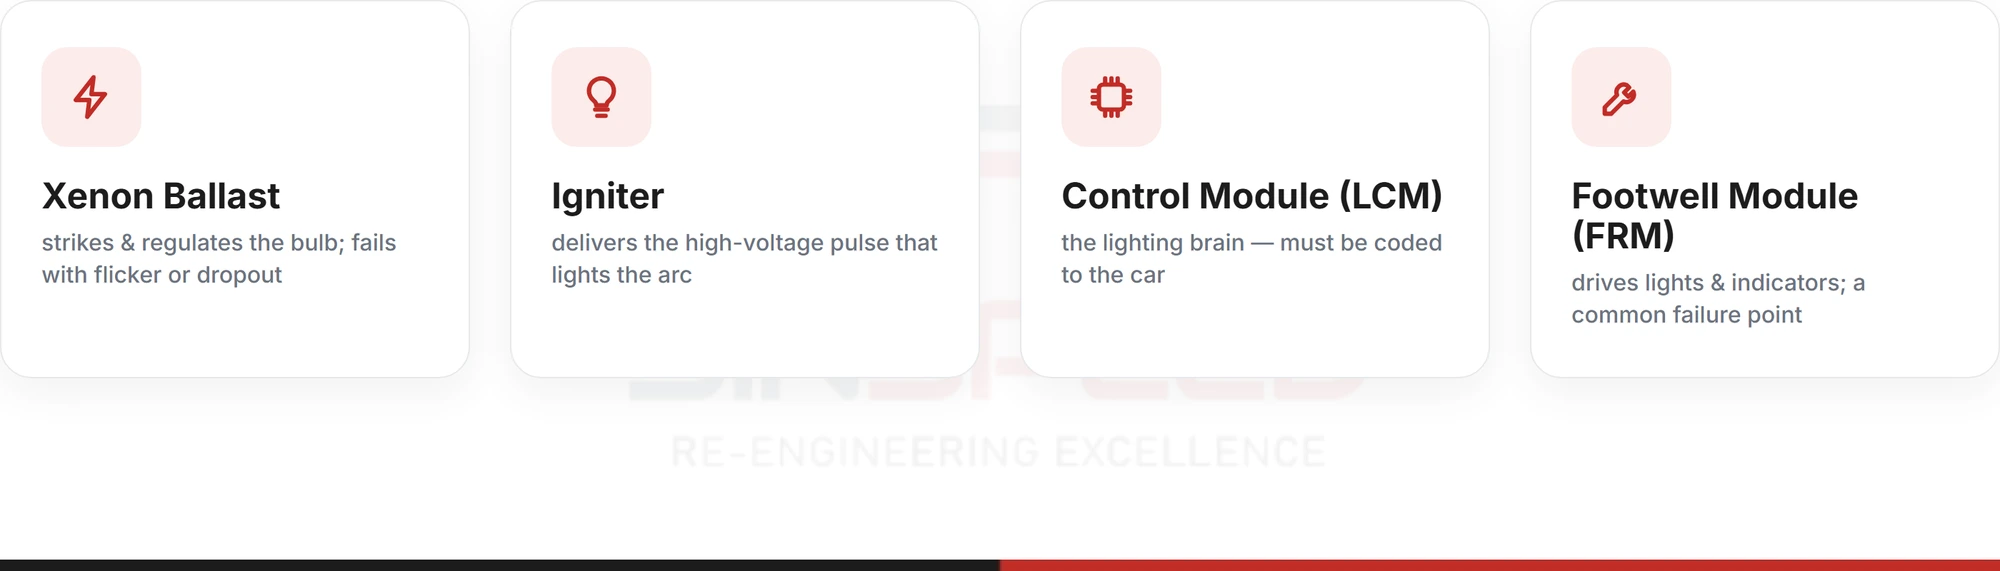
BMW spreads its exterior lighting across several different control units, so the right repair starts with knowing which one has failed. On a BMW the lighting is rarely run by a single box — the work is shared between a central lighting module and the xenon or LED electronics inside each headlamp. We repair the full range at circuit-board level:
Light Control Module (LCM / LSZ) — fitted to earlier models such as the E38, E39, E46 and E53, this central module runs the exterior and interior lighting. When it fails you tend to see phantom bulb-out warnings, dead dipped beams or indicators that behave erratically.
Footwell Module (FRM / FRM2 / FRM3) — used across the E8x, E9x, E6x and X-series, the FRM sits in the driver’s footwell and controls the exterior lighting, indicators and daytime running lights. It is notorious for corrupting its own memory after a flat battery or a jump start, taking the lights, indicators, windows or wipers with it.
Xenon control units and ballasts — the bi-xenon (HID) systems on most E- and F-series BMWs use a ballast to regulate the arc and an igniter to strike it. These are typically Automotive Lighting (AL) or Hella units, and they fail independently of the bulb.
Adaptive headlight (AFS / TMS) modules — the units that swivel the beam into bends and level it over crests. A failed adaptive module throws the familiar ‘Adaptive Headlight — Malfunction’ message and often leaves the projector stuck straight ahead.
Angel-eye and DRL LED drivers — the halo rings and daytime-running signatures are driven by small LED driver boards that typically fail one ring or one section at a time.
F-series and newer LED headlight modules — the driver and control electronics behind the later full-LED headlamps.
This is the BMW side of our wider headlight control module repair service. The modules above are built on the same AL and Hella electronics found across many marques — which is exactly why they are repairable rather than throwaway.
How do I know if my BMW headlight control module has failed?
BMW lighting faults are misread constantly, because a dead headlight, a dashboard warning and a stored fault code can each point at a different part. Reading the pattern of the fault — not just ‘the light is out’ — is what tells you whether the bulb, the ballast, an adaptive module or the FRM has actually failed.
Symptom on your BMW
Most likely module
What it usually is not
‘Adaptive Headlight — Malfunction’ on the iDrive, beam stuck straight
Adaptive (AFS/TMS) control module or stepper motor
Rarely the bulb
One xenon strikes, glows pink or blue, then cuts out
Xenon ballast failing to hold the arc
Not the bulb
No dipped beam one side, bulb works when swapped over
Xenon control unit or ballast
Not the bulb
Indicators, lights, windows or DRLs dead after a flat battery or jump start
Corrupted Footwell Module (FRM)
Not a blown fuse in most cases
One angel-eye ring or DRL section dark, the rest fine
Angel-eye / DRL LED driver
Not the whole headlamp
Intermittent flicker, worse over bumps
An internal fault in the module or ballast
Not a failing bulb
Random bulb-out warnings for lamps that clearly work
Light Control Module (LCM)
Not the bulbs
On many BMW systems the headlight electronics also talk to the rest of the car over the vehicle bus, so a failure usually stores a fault code — a xenon control unit that has stopped communicating, or a headlight module that will no longer talk to the Footwell Module. Before you buy anything, swap a known-good bulb to the affected side. If the light still will not work with a good bulb, the fault is upstream in the module or ballast — and that is where a board-level repair belongs, not another bulb.
Ballast, igniter, control module or FRM — what has actually failed?
On a BMW headlamp, four different things can produce ‘my light does not work’, and they are not interchangeable. Getting the diagnosis right is the difference between a repair that lasts and one that fails again within the fortnight.
The bulb (D1S, D2S, D3S or D4S on xenon cars) is the gas-discharge lamp itself; at the end of its life it dims and turns pink or purple gradually. The igniter is the high-voltage element that strikes the initial arc — when it fails the lamp will not light at all, or strikes and dies instantly. The ballast, or xenon control unit, regulates the current once the arc is lit; a failing ballast lets the light strike and then cut out, flicker, or refuse to run even with a perfect bulb. The control module — the LCM, FRM or adaptive TMS unit — is the circuit board that switches, levels and codes the lighting, and it can fail while the bulb, igniter and ballast are all fine.
We keep these distinct because repairing the wrong one is wasted money. A ballast fault is not cured by a bulb; a corrupted FRM is not cured by a new headlamp. We test the unit you send, identify the stage that has genuinely failed — output transistors, a voltage-conversion stage, internal connections fatigued by repeated under-bonnet heat cycling, or a corrupted memory chip — and repair that, rather than replacing a part that was never the problem.
Can a BMW headlight module be repaired instead of replaced?
In the large majority of cases, yes — a BMW headlight module can be repaired rather than replaced, and on a modern BMW that is usually the sensible route. Each of these units is a circuit board, and board-level faults can be put right at board level rather than replacing the whole unit — the failed stage identified and repaired, weak points reinforced, and a corrupted FRM recovered and rewritten.
The alternative is more involved than it first looks. A genuine BMW bi-xenon or adaptive LED headlamp assembly is one of the pricier lighting components on the car, and many now arrive as a bare housing with the control electronics supplied blank and unprogrammed — which then have to be coded to the car before they will work. We mention that only as neutral context for why board-level repair is usually the better call, not as a saving to be claimed: keeping your original, correctly-matched unit on the car removes the fault at its root and avoids the coding and matching that a new module drags in behind it.
Because we repair rather than swap, we can also reinforce the section of the circuit that failed in the first place — so the remanufactured module is built to outlast the weakness that brought it in. Replacement genuinely makes sense when a housing is smashed or the optics are destroyed. But where the headlamp is sound and only the electronics have failed, repair is the stronger call.
Why BMW headlight modules must be coded to the car
Programming is where BMW lighting differs from most other cars, and it is the step people most often get caught out by. Many BMW lighting modules are married to the vehicle: they carry coding tied to the VIN and the car’s options, and they have to be programmed before the car will accept them. Drop in a blank replacement FRM or adaptive module and, without coding, the lights, indicators or adaptive function simply will not respond.
The Footwell Module is the classic example. When an FRM corrupts after a low battery or a jump start, it is often not a hardware failure at all — the module’s memory has been scrambled, and it needs its firmware and coding recovered and rewritten to come back to life. We recover these modules and rewrite them on dealer-level equipment rather than condemning a unit that is mechanically fine.
That is why we return BMW modules coded and ready to fit wherever the system requires it. We retain your unit’s original programming where we can, and where a module must be coded to the car we program and calibrate it on dealer-level diagnostic tools before it leaves us. In most cases the unit arrives ready to bolt back on and drive — with none of the separate dealer programming trip that a blank new module would still need.
How our BMW mail-in and mobile repair service works
Our BMW headlight repair runs on a mail-in, repair-and-return model, with a mobile option for the areas we cover. You are sending us your own module to be remanufactured, not buying a mystery exchange unit off a shelf.
1. Tell us what has failed. Start a repair enquiry through our repair form with your BMW’s model, the symptom and — if you have it — the part number stamped on the module. If you are not sure which unit has failed, contact us with the symptom and the warning message and we will point you at the right one. 2. Send us the unit. Remove and post the failing module — the FRM, LCM, xenon ballast or adaptive control unit — or send the complete headlamp where the fault sits inside the lamp. Independent garages and trade workshops send us BMW modules the same way. 3. We diagnose and repair. We test the unit, identify the failed stage, repair it at board level and reinforce the known weak points, then program and calibrate it to your car where the system needs it. 4. We return it ready to fit. The remanufactured module comes back coded and ready to install, with a lifetime, unlimited-mileage warranty on the reman.
Because the repair keeps your original unit, there is no VIN-matching lottery and, in most cases, no separate trip to a dealer to code a new part.
Frequently asked questions
Can a BMW headlight control module be repaired?
Yes, in most cases. Whether it is the Light Control Module, the Footwell Module, a xenon ballast or an adaptive control unit, the fault sits on a circuit board — blown output stages, fatigued internal connections, water-damaged connectors or corrupted memory — and we repair that at component level, then reinforce the weak points rather than fitting a whole new headlamp.
Does BMW use xenon headlights?
Yes. Bi-xenon (HID) headlamps were fitted widely across the E- and F-series ranges, alongside halogen on lower trims and full-LED on later models. Xenon systems use a bulb, an igniter and a ballast, and it is usually the ballast or control unit that fails rather than the bulb.
How do I know if my BMW headlight control module is bad?
Swap a known-good bulb to the affected side first. If the light still will not work, the fault is upstream in the ballast or module. An adaptive-headlight malfunction message, a xenon that strikes then cuts out, or lights and indicators lost after a flat battery all point at the control electronics, and the car will usually have logged a fault code.
How do you program a BMW headlight module after repair?
Many BMW modules must be coded to the car’s VIN before they will work. We retain the original programming where we can, and where the system needs it we program and calibrate the repaired unit on dealer-level equipment before it ships — so it arrives ready to fit, with no separate dealer coding trip needed.
Why did my BMW lose its lights or indicators after a flat battery or jump start?
That is the classic Footwell Module (FRM) fault. A voltage drop can scramble the module’s memory rather than damage the hardware, taking out exterior lights, indicators and sometimes windows or wipers. We recover and rewrite these modules on dealer-level equipment rather than condemning a unit that is otherwise sound.
Do I send the whole headlight or just the module?
Usually just the module — the FRM, LCM, ballast or adaptive control unit — which keeps postage simple. Send the complete headlamp only where the fault sits inside the lamp itself. If you are unsure, contact us with the symptom and we will tell you what to send.
Is a faulty BMW headlight an MOT failure in the UK?
Yes. A headlamp that does not work, is insecure, or is badly misaligned is an MOT failure, and using a vehicle on the road with a defective obligatory lamp can be an offence under the Road Vehicles Lighting Regulations. Repairing and correctly calibrating the unit keeps the car both legal and safe.
Why choose Sinspeed for BMW headlight electronics
BMW lighting electronics are a specialism here, not a sideline. We work on the BMW Light Control Module, Footwell Module, xenon ballasts and adaptive control units routinely, and we know the Automotive Lighting and Hella platforms they are built on — including the FRM corruption a flat battery leaves behind and the coding a BMW demands before it will accept a module back. Repairs are carried out at circuit-board level in an ESD-safe, cleanroom-standard workshop by an in-house team of electronic engineers, then tested on bespoke Hardware-in-the-Loop rigs that simulate the heat, vibration and electrical load a headlight actually sees on the car. Every module is programmed and calibrated to your BMW on dealer-level tools before it ships, and most reman parts carry a lifetime, unlimited-mileage warranty. Independent garages and main-dealer workshops send us their BMW lighting modules too — because a repaired, reinforced and correctly coded unit goes back on the car ready to work.
Final thoughts
A BMW headlight fault is rarely the end of a headlamp, and rarely just a bulb. Whether it is a xenon ballast that can no longer hold the arc, an adaptive module throwing a malfunction message, or a Footwell Module scrambled by a flat battery, the unit on your car can almost always be recovered, repaired and coded back to life rather than replaced. Tell us the model, the symptom and the part number if you have it, and we will tell you exactly what has failed and how we will fix it — start a repair enquiry or contact us with the details. You can also see the full range on our headlight control module repair page.
Summary: The Ford Transit electronic turbo actuator is one of the most commonly failed components across the entire Transit range — from the MK7 2.2 TDCi right through to the MK8 2.0 EcoBlue. When it fails, your van goes into limp mode, loses power and may store fault codes your local garage can’t decipher. Replacing the whole turbocharger — because the actuator isn’t sold separately by Ford — can cost well over £1,200 plus labour. There is a far better option.
Sinspeed has been remanufacturing electronic turbo actuators since 2007, using genuine OEM-grade components, with a lifetime unlimited-mileage warranty as standard on every repair. You remove the actuator, post it to us from anywhere in the UK or internationally, and we return it rebuilt, tested and ready to refit — no programming required.
What Is an Electronic Turbo Actuator and What Does It Do?
Modern Ford Transit diesel engines use a Variable Geometry Turbocharger. The electronic turbo actuator is the component that precisely controls the turbo’s boost pressure by adjusting the internal vanes. It receives signals from the engine ECU and ensures the turbo delivers the right amount of boost for smooth power and good fuel economy. When it fails, the system can no longer control boost correctly, triggering limp mode and fault codes.
Which Ford Transit Models and Engines Are Affected?
Electronic turbo actuator failure is not limited to one generation of Transit. The following models and engine variants are among those commonly affected:
Ford Transit MK7 (2006–2014) — 2.2 TDCi
The MK7 fitted with the 2.2 TDCi Duratorq engine in 85 PS, 100 PS, 115 PS, 125 PS and 140 PS outputs is the most widely reported Transit for electronic turbo actuator failure. The Hella actuator (common part number G41752406 / 6NW009206) fitted to these vehicles is a known weak point. Fault codes P132A and P132B are the most common findings on this generation. Vehicles built between 2008 and 2014 are the most affected, though earlier MK7 2.2s with the Hella-type unit can also present the same faults.
Ford Transit MK8 (2014–present) — 2.2 TDCi
The early MK8 continued with the 2.2 TDCi before the switch to the EcoBlue engine. These vehicles carry the same actuator architecture as the later MK7 and are equally susceptible to the same failure modes.
Ford Transit MK8 (2016–present) — 2.0 EcoBlue TDCi
The 2.0 EcoBlue (also badged 2.0 TDCi) replaced the 2.2 TDCi from around 2016. Ford Transit Custom models fitted with this engine have been widely reported as suffering from poor performance linked to a faulty turbocharger actuator. Fault code P2599 is the most commonly associated code on these vehicles.
Ford Transit Custom (2013–present) — 2.0 TDCi / 2.0 EcoBlue
The Transit Custom, Ford’s smaller panel van in the Transit family, shares the same 2.0 TDCi and 2.0 EcoBlue engines found in the full-size Transit. Turbocharger actuator faults resulting in limp mode and loss of power have been identified as a common issue on these vehicles across multiple model years.
Other Ford Vehicles Using the Same Actuator
The Hella electronic turbo actuator used in the Transit MK7 2.2 TDCi is also found in other Ford models of the same era, including the Ford Mondeo, Ford Galaxy, Ford S-Max and Ford Kuga fitted with compatible 2.2 TDCi or 1.8 TDCi engines. If you drive one of these vehicles and are experiencing the same symptoms, contact us — we may be able to help.
Common Fault Codes
When the turbo actuator fails, the engine ECU detects the anomaly and stores one or more of the following fault codes:
Fault Code
Description
P132A
Turbocharger/Supercharger Wastegate Actuator A — Circuit Range/Performance
Turbocharger/Supercharger Boost Control ‘A’ Position — Performance (common on 2.0 EcoBlue/TDCi)
A critical point worth noting: codes P132A and P132B frequently come up as ‘unknown’ or undefined on many generic OBD2 scanners. Your mechanic’s scanner may not recognise them. These codes are Ford-specific and directly relate to the electronic turbo actuator. If you have been told a code is unrecognised or your garage is unsure what it points to, this page and our repair service are exactly what you need.
Symptoms of a Failing Ford Transit Turbo Actuator
Turbo actuator failure on the Ford Transit rarely happens without warning. The fault typically starts as an intermittent issue — perhaps appearing under hard acceleration or during extended motorway driving — and becomes progressively worse until it is permanent. Recognising the early signs can prevent more serious and costly secondary damage.
The most common symptoms include:
Limp mode — The engine management system detects a boost control fault and limits engine power to protect the drivetrain. The van feels gutless, particularly above 2,000 RPM.
Flashing glow plug warning light — The glow plug light flashing while driving is a well-known indicator of a boost system fault, including actuator failure.
Engine management light (EML) illuminated — The ECU stores a fault and triggers the warning light.
Loss of power under acceleration — Particularly noticeable when pulling away from junctions, when loaded, or when climbing inclines.
Intermittent loss of power — The fault clears temporarily when the ignition is cycled (switched off and restarted), only to return after a period of driving. This is a hallmark of early-stage actuator failure.
Black smoke from the exhaust — When the vanes are stuck in the wrong position, combustion becomes inefficient and unburnt fuel exits via the exhaust.
Poor fuel economy — Incorrect boost pressure forces the engine to work harder for the same output, consuming more fuel.
Unusual turbo noises — Whistling, whining or rattling from the turbo area, particularly under load, can indicate that the vane mechanism is not moving freely.
Actuator arm not moving — If the actuator is physically inspected with the engine off, the arm may be seized or showing no resistance.
Traction control light illuminating alongside EML — Particularly common on MK7 and early MK8 Transit models.
Important: Several of these symptoms — particularly limp mode and loss of power — can also be caused by other faults including boost pressure leaks (cracked intercooler hoses, split boost pipes), a faulty MAP/boost pressure sensor, EGR valve issues, a DPF fault or even an engine ECU fault. Proper diagnostic scanning and a process of elimination is always recommended before committing to any repair.
What Causes the Electronic Turbo Actuator to Fail?
The electronic turbo actuator lives in one of the harshest environments in the engine bay — mounted directly on the turbocharger, which itself reaches extreme temperatures during operation. Several factors can lead to failure:
Turbocharger fault
This is the most common underlying cause of actuator-related problems on the Ford Transit, particularly on vehicles used predominantly for short urban journeys. When the turbocharger starts to fail, it can accelerate the wear on the turbo actuator.
Heat and vibration
Constant thermal cycling (the repeated heating and cooling of the engine bay) combined with road vibration slowly wears the internal parts of the actuator. Over many thousands of miles this natural ageing process leads to loss of precise control.
Water ingress and corrosion
The actuator’s position on the turbocharger makes it vulnerable to moisture intrusion, particularly in UK driving conditions. Water ingress causes internal corrosion, interferes with the electronic components and can cause erratic feedback signals to the ECU.
Wiring and connector failure
The actuator communicates with the ECU via a wiring harness and multi-pin connector. Vibration, heat cycling and age can cause connector pins to loosen or the insulation on wires to chafe and crack. A poor electrical connection is often intermittent — the van runs fine in some conditions but faults when the connector flexes under temperature or vibration.
Position sensor failure
The actuator contains an integrated position sensor (a potentiometer or Hall effect sensor) that feeds vane position data back to the ECU in real time. When this sensor drifts out of calibration or fails outright, the ECU cannot confirm whether its commands are being executed — triggering fault codes and limp mode even if the mechanical parts are intact.
Repair vs. Replacement: Costs Compared
When a Ford Transit turbo actuator fails, many Ford dealers and garages quote for a complete turbocharger replacement. This is because Ford does not supply the electronic actuator as a standalone replacement part — it is only available as part of a complete turbocharger assembly. This creates an artificially high repair cost that catches Transit owners off guard.
Option
Typical Cost
Warranty
Notes
New turbocharger (dealer/OEM)
£1,200–£2,000+ (parts only)
12 months
Actuator not sold separately by Ford
Turbocharger replacement (independent)
£800–£1,500 incl. fitting
12 months typical
Still replacing components that may not need replacing
Remanufactured turbo actuator (Sinspeed)
From £100
Lifetime, unlimited mileage
Only the faulty component remanufactured
The Sinspeed remanufacture route targets only the component that has actually failed — the electronic actuator. The turbocharger itself remains on your van, and the actuator is removed, sent to us, rebuilt with OEM-grade components, tested and returned. There is no need to purchase an entirely new turbo assembly, and our repair carries a lifetime unlimited-mileage warranty — significantly superior to the 12-month cover offered with new replacement units.
For fleet operators, sole traders and owner-drivers where the Transit is essential to daily income, keeping downtime and costs to a minimum matters enormously. Our mail-in repair process is designed with exactly that in mind.
The Sinspeed Ford Transit Turbo Actuator Repair Service
Sinspeed has been remanufacturing automotive electronics since 2007 — that is over 18 years of specialist experience. Our Ford Transit turbo actuator repair service covers the full range of affected models, including the MK7 2.2 TDCi and MK8 2.0 TDCi / EcoBlue variants.
What our remanufacture process delivers:
Full strip-down and inspection of the complete actuator assembly
Identification and replacement of all failed and wear-prone internal components using OEM-grade parts
Full bench testing against OEM specifications before despatch
No coding required on refit — the repaired unit is plug-and-play on return
Every repaired Ford Transit turbo actuator leaves our workshop covered by a lifetime, unlimited-mileage warranty.
Our repairs are used by independent garages, fleet operators and dealerships across the UK and internationally. We accept mail-in repair enquiries from anywhere in the UK and from international customers worldwide.
How Our Repair Process Works
Sending your Ford Transit turbo actuator to Sinspeed is straightforward. Here is the process step by step:
Step 1 — Remove the actuator from the vehicle
The electronic actuator is a bolt-on component mounted directly to the turbocharger housing. On the MK7 Transit 2.2 TDCi, the turbo is accessible from above on the driver’s side. The actuator itself is secured by mounting bolts and connected via a multi-pin electrical connector. You do not need to remove the turbocharger from the vehicle to remove the actuator — the actuator can be unbolted and unplugged independently on most Transit variants. If you are unsure, your local garage can assist with the removal.
Step 2 — Complete the repair form and send your unit to us
Complete our online repair form so we can log your job and prepare for your unit’s arrival. After completing, you will have the option to print it off to place inside the box. Pack the actuator securely in a padded box with bubble wrap to protect it during transit. Send your unit via a tracked courier service to our workshop. We accept units from anywhere in the UK and internationally.
Step 3 — Testing and remanufacture
Once your actuator arrives, our engineers test it to confirm the fault, carry out the rebuild process and test to confirm full functionality.
Step 4 — Return despatch with lifetime warranty
Your fully repaired actuator is despatched back to you, covered by our lifetime unlimited-mileage warranty. Simply refit and reconnect — no coding required.
Why Choose Sinspeed?
18+ years of specialist experience — remanufacturing automotive electronics since 2007
Lifetime unlimited-mileage warranty on every Ford Transit turbo actuator repair.
Up to 90% cheaper than a dealer turbocharger replacement — you pay for what is actually broken
No programming required — repaired units are plug-and-play
Mail in from anywhere — UK and international customers welcome
Fast turnaround — we understand the Transit is a working vehicle and downtime costs money
Genuine OEM-grade components — we do not cut corners with inferior parts
Used by dealerships and independent garages across the UK — our work is trusted at every level of the trade
FAQs
Will my Ford Transit turbo actuator need programming after repair?
No. Our rebuilt turbo actuators are returned as plug-and-play units. They do not require any coding or programming when refitted to the vehicle. Simply bolt the actuator back onto the turbocharger, reconnect the electrical connector, clear any stored fault codes with a diagnostic scanner, and the van is ready to drive.
Can I still drive my Ford Transit with a faulty turbo actuator?
We strongly advise against extended driving once symptoms have appeared. When the actuator fails, the vanes can become stuck in either an overboost or underboost position. Overboost places excessive mechanical stress on the engine internals and can cause serious damage in a short period. Underboost is less immediately dangerous but will leave you without adequate power and in limp mode. If the van goes into limp mode, cycling the ignition may restore temporary power but have the vehicle attended to as soon as possible.
My garage says I need a new turbocharger — do I definitely need a full replacement?
Not necessarily. The most common cause of limp mode and turbo-related fault codes on the Ford Transit is the electronic actuator, not the turbocharger itself. The reason garages quote for a full turbo is that Ford does not supply the actuator as a separate part. Sinspeed remanufactures the actuator independently, saving you the cost of a complete turbo assembly. If you have fault codes P132A, P132B, P2263, P0234, P0299 or P2599, contact us before agreeing to a full turbo replacement.
How long does the repair take?
Turbo actuator repairs are typically completed within 1-2 working days.
Can I send my actuator from outside the UK?
Yes. We regularly receive units from international customers. If you are sending from outside the UK, please contact us before shipping so we can advise on the best courier options and any relevant customs documentation required.
What warranty do I get on a repaired Ford Transit turbo actuator?
Every repaired turbo actuator carries a lifetime, unlimited-mileage warranty as standard. There are no mileage caps and no time limits. This applies to all Ford Transit actuator repairs carried out by Sinspeed.
Are there any other faults that can mimic turbo actuator failure?
Yes. Boost leaks from cracked intercooler hoses or split boost pipes, a faulty MAP (manifold absolute pressure) sensor, a failing boost pressure sensor and in some cases an engine ECU fault can all produce similar symptoms and even similar fault codes. We always recommend a thorough diagnostic check — including physical inspection of all boost-related hoses and sensors — before concluding the actuator is at fault. If in doubt, contact us with your fault codes and vehicle details and we will advise.
Final Thoughts
The Ford Transit electronic turbo actuator is one of the most frequently failing components across the entire Transit range — and one of the most expensive problems to fix if you take the dealer route of a complete turbocharger replacement. The good news is that in the vast majority of cases, the turbocharger itself is perfectly serviceable. It is the actuator — a relatively compact electronic assembly — that fails, and it can be rebuilt to a standard that meets or exceeds the original specification.
Sinspeed has been doing exactly this since 2007. With over 18 years of specialist experience, a genuine lifetime unlimited-mileage warranty on every repair, and a mail-in service that accepts units from anywhere in the UK or internationally, there is no reason to accept a £1,200-plus dealer quote when a professional remanufacture is available at a fraction of the cost.
If your Ford Transit is in limp mode, the glow plug light is flashing or your diagnostic scanner has thrown up codes pointing at the turbo actuator, get in touch to see how we can help.
Solutions: Avoid used/new OEM units due to recurring flaws. Opt for Sinspeed’s remanufacturing with upgrades, lifetime warranty, and quick turnaround. Simply fill in our Repair Form and send it in with your turbocharger!
The Garrett GT2052V turbocharger, commonly fitted to various Nissan, Volkswagen, Audi, Skoda, and Land Rover models with diesel engines, is known for premature failures due to over-boosting, actuator issues, and sensor contamination. This is the second most common failing turbocharger we see, with the BorgWarner K03/K04 turbo failures holding firmly in first place. Common symptoms for the GT2052V include erratic boost pressure, loss of power, hissing noises, and potential engine damage like piston cracking. Fault codes such as P0234 (over-boost condition) and P0299 (under-boost condition) often appear. At Sinspeed, we offer a professional remanufacturing service with upgraded components to address these design flaws, backed by our unlimited mileage lifetime warranty. Avoid costly new or used replacements—send your unit to us for a reliable fix.
2. What is the Garrett GT2052V Turbocharger?
The Garrett GT2052V is a variable nozzle turbine (VNT) turbocharger engineered specifically for diesel engines, delivering efficient boost across a broad RPM range to enhance power output and torque while maintaining fuel economy. This model features a sophisticated variable geometry system that adjusts the turbine vanes via vacuum or electronic actuation, allowing for optimal exhaust gas flow. By narrowing the vanes at low RPMs, it improves throttle response and reduces turbo lag, while opening them at higher RPMs prevents over-boosting and maintains efficiency. With a typical compressor trim of 52 and capable of supporting up to around 225 horsepower in stock configurations, the GT2052V is oil-cooled and utilises a journal bearing setup for durability.
However, despite its advanced design, the GT2052V’s integration into high-compression diesel engines often leads to vulnerabilities. Issues such as oil vapour contamination from the positive crankcase ventilation (PCV) system, flaws in exhaust gas recirculation (EGR) setups, and vane sticking due to soot accumulation can compromise performance. These problems are particularly pronounced in demanding applications like off-roading, towing, or high-mileage commercial use, where heat and contaminants accelerate wear. Over time, this has made the GT2052V a frequent topic in automotive forums and repair communities, with owners reporting failures as early as 100,000 miles in some cases.
3. Vehicle Applications
The Garrett GT2052V turbocharger is widely utilised in a variety of diesel-powered vehicles, particularly those requiring robust performance in off-road, commercial, or passenger applications. It is most commonly associated with Nissan’s ZD30DDTi engine in models like the Patrol and Safari, where it supports heavy-duty use but often encounters issues due to engine design, such as over-boosting exacerbated by EGR modifications. In European vehicles, it features prominently in Volkswagen Group’s 2.5L TDI V6 engines across Audi, Volkswagen, and Skoda models, offering smooth power delivery but susceptibility to soot buildup from urban driving cycles. Additionally, it appears in Land Rover’s Defender with the 2.4L TDCI engine, enhancing torque for rugged terrain while facing challenges from dust and heat in off-road environments.
This versatility across manufacturers highlights its popularity for balancing efficiency and power, though failures are reported universally in high-stress scenarios. For instance, in Nissan applications, the turbo’s interaction with the high-compression ZD30 engine can lead to piston damage if over-boosting isn’t managed, whereas in Volkswagen Transporter vans, vane sticking is more prevalent due to frequent stop-start operation.
Manufacturer
Model
Engine
Years
Nissan
Patrol GU Y61
ZD30DDTi 3.0L Diesel
2000-2016
Nissan
Safari
ZD30DDTi 3.0L Diesel
1997-2016
Nissan
Terrano II
ZD30DDTi 3.0L Diesel
1999-2007
Audi
A4 (B5/B6)
2.5L TDI V6
1997-2005
Audi
A6 (C5)
2.5L TDI V6
1997-2005
Audi
A8 (D2)
2.5L TDI V6
1997-2002
Volkswagen
Passat (B5)
2.5L TDI V6
1998-2005
Volkswagen
Transporter T5
2.5L TDI (AXD/AXE)
2003-2009
Volkswagen
LT Van
2.5L TDI
1996-2006
Skoda
Superb (B5)
2.5L TDI V6
2001-2008
Land Rover
Defender
2.4L TDCI
2007-2016
4. Part Numbers
Identifying the correct part number for the Garrett GT2052V is essential for ensuring compatibility and proper replacement. Garrett assigns specific turbocharger numbers, while OEM manufacturers like Nissan, Volkswagen, Audi, and Land Rover provide their own references, which may vary by engine variant (e.g., direct injection or common rail) and model year. These numbers can be found on the turbo’s nameplate, typically located on the compressor housing, and are crucial for sourcing remanufactured or upgraded units to avoid mismatches. Variations often include superseding suffixes like “-S” for updated versions, and cross-referencing them can help confirm fitment across different applications.
Common part numbers encompass both Garrett’s internal codes and vehicle-specific OEM identifiers, allowing technicians to match the turbo to the exact engine setup. For example, numbers starting with 724639 are prevalent in Nissan ZD30 applications, while those like 454135 are more common in Volkswagen Group vehicles.
Part Number
724639-5006S
454135-5010S
454135-0001
454135-0002
454135-0006
454205-0006
454205-9006
752610-5005S
727264-5004S
14411-VC100
14411-VC200
14411-2X900
14411-VS40A
074145701DV248
LR018396
LR018497
LR010138
LR021013
LR012858
5. Common Issues with the Garrett GT2052V Turbocharger
The GT2052V’s variable geometry design, while advanced, often struggles in high-compression diesel engines due to inherent flaws that manifest under prolonged stress. Over-boosting remains a primary concern, where boost pressure spikes beyond safe levels—frequently exceeding 20-25 psi—placing excessive strain on the turbo and engine components. This issue is particularly acute in Nissan ZD30 applications, where the turbo’s erratic boost curve can lead to piston melting or cracking if not addressed. The root cause often lies in poorly designed EGR systems that recirculate soot-laden exhaust gases, contaminating sensors and causing the ECU to overcompensate with fuel and boost.
Oil vapour from the crankcase ventilation (PCV) system further exacerbates fouling, coating critical components like the mass airflow (MAF) and manifold absolute pressure (MAP) sensors in a layer of tar and residue. This results in inaccurate airflow readings, triggering inconsistent boost delivery. In Volkswagen and Audi models, soot buildup from short urban trips is a common culprit, while in off-road vehicles like the Land Rover Defender, dust ingress can accelerate wear.
Other frequent problems include:
Turbo Actuator Failures: The vacuum or electronic actuator can stick or fail entirely, leading to erratic vane control and boost inconsistencies. This is prevalent in Volkswagen and Audi applications, where carbon deposits from incomplete combustion affect the VNT mechanism, often requiring actuator replacement or cleaning.
Leaking Intercooler or Pipe Fittings: Crimped fittings or degraded seals allow oil leaks and boost loss, forcing the turbo to overspeed to compensate, which shortens its lifespan.
Sensor Fouling: MAF, MAP, and boost pressure sensors become coated in oil, tar, or soot from EGR, triggering over-boost or under-boost conditions and potentially activating limp mode.
Vane Sticking: Carbon deposits cause the variable vanes to seize in the VNT system, reducing efficiency, increasing exhaust backpressure, and leading to poor throttle response or limp mode engagement.
Overheating and Overspeeding: High exhaust gas temperatures (EGT), often from modifications like EGR blanking or larger exhaust systems, can melt pistons or crack the turbo housing, especially in Nissan ZD30 setups where boost spikes are notorious.
Bearing Wear and Oil Starvation: In high-mileage units, journal bearings wear due to contaminated oil or insufficient lubrication, resulting in shaft play, unusual noises, and eventual catastrophic failure.
Noisy Operation: Whining or grinding sounds may indicate turbo issues, but diagnostics should rule out other sources like exhaust leaks or accessory belts, as seen in some Nissan Patrol cases.
These issues are intrinsically linked to the engine’s high compression ratios and the turbo’s limitations in heavy-duty environments. Failures are especially notorious in the Nissan ZD30 engine, where over-boosting has been a persistent complaint in off-road communities for decades, often requiring aftermarket interventions for resolution.
6. Symptoms of Garrett GT2052V Turbocharger Failure
Recognising early signs of GT2052V failure is crucial to prevent catastrophic engine damage, such as blown pistons or complete turbo disintegration. Symptoms often develop gradually, starting with subtle performance dips before escalating to more noticeable problems. For example, in daily driving, you might first notice hesitation during acceleration, while under heavy load—like towing or off-roading—the issues become more pronounced.
Common symptoms include:
Erratic or spiking boost pressure, leading to uneven acceleration and a “jerky” driving experience as the turbo struggles to maintain consistent output.
Loss of power, especially under load or at higher RPMs, where the engine feels sluggish and unresponsive, often accompanied by a drop in top speed.
Hissing or whistling noises from leaking pipes, fittings, or actuator issues, indicating boost escaping before reaching the engine.
Black smoke from the exhaust due to over-fuelling, as the ECU compensates for perceived low boost by injecting excess diesel.
Elevated exhaust gas temperatures (EGT), potentially causing piston melting or cracking, particularly dangerous in modified vehicles.
Limp mode activation, where the ECU reduces engine performance to protect components, often triggered by sensor faults or over-boost detection.
Unusual turbo whine, rattling, or grinding from bearing wear or vane issues, which may worsen with engine speed.
Oil consumption or leaks around the turbo, signalling seal failure or oil starvation.
Reduced fuel efficiency, as inefficient boosting forces the engine to work harder.
If these symptoms are ignored, they can escalate to complete turbo failure, stranding the vehicle or necessitating expensive engine rebuilds. Regular monitoring with boost and EGT gauges is recommended for early detection.
7. Common Fault Codes
Diagnostic trouble codes (DTCs) are invaluable for pinpointing turbo-related problems in vehicles equipped with the GT2052V. These codes are logged by the engine control unit (ECU) when sensors detect anomalies, and reading them with an OBD-II scanner can guide repairs. In Nissan models, codes often relate to boost irregularities, while in Volkswagen Group vehicles, they may highlight actuator or vane issues.
Common fault codes include:
P0234: Turbocharger over-boost condition—indicates excessive pressure spikes, common in ZD30 engines with EGR modifications.
P0299: Turbocharger under-boost condition—suggests actuator or vane sticking, leading to insufficient boost.
P0238: Boost pressure sensor circuit high—due to fouled sensors sending erroneous high readings.
P0101: MAF sensor performance—frequently triggered by contamination from oil vapour or soot.
P0400: EGR flow malfunction—linked to blockages that indirectly affect boost control.
P1247: Turbocharger boost pressure low—similar to P0299, often seen in Audi and VW applications.
P0235: Turbocharger boost sensor A circuit—indicating sensor failure or wiring issues.
P2563: Turbocharger boost control position sensor circuit—specific to VNT actuator problems.
Always use a professional OBD-II scanner to read and clear these codes, and address underlying causes promptly to avoid recurring issues. In some cases, multiple codes may appear simultaneously, pointing to interconnected system failures.
8. Why Buying a Used or New Garrett GT2052V Turbocharger is Not Ideal
Opting for a used GT2052V turbocharger carries significant risks, as these units often inherit the same design flaws—such as weak actuators, vane sticking tendencies, or contamination-prone components—that led to their original failure. Sourced from salvage yards or online marketplaces, used turbos may have hidden wear, like bearing play or internal carbon buildup, resulting in short lifespans and repeated breakdowns. Owners frequently report failures within months, exacerbating downtime and repair costs.
New OEM replacements, while offering initial reliability, retain the inherent vulnerabilities of the stock design and can command prices upwards of £1,000-£2,000, plus labour. Without addressing root causes like EGR contamination or oil vapour issues, even new units succumb to the same problems, with many users experiencing premature wear in unmodified engines. For instance, in Nissan Patrols, new turbos often fail due to unchecked over-boosting, leading to warranty disputes and additional expenses.
Instead, consider having your existing failed turbocharger rebuilt by specialists. Having your turbo reconditioned will return it back to it’s original operating condition and often will include eliminating known design flaws to prevent repeat failures, all at a fraction of the cost of a new unit.
Additionally, preventive modifications like oil catch cans to trap vapour, EGR blanks (where legally permissible), boost control valves such as the Dawes valve for spike prevention, and EGT/boost gauges for real-time monitoring. Upgraded aftermarket turbos with billet compressor wheels provide superior heat resistance and durability but typically require ECU remapping for optimal integration.
9. Prevention and Maintenance Tips
Preventing GT2052V failures involves proactive maintenance and modifications to mitigate common stressors. Regular oil changes with high-quality synthetic diesel oil are essential to prevent contamination and ensure proper lubrication of the journal bearings. Install an oil catch can to capture PCV vapours before they reach the intake, reducing sensor fouling and vane sticking.
Monitor boost and EGT levels with aftermarket gauges, aiming to keep sustained boost below 15-18 psi to avoid spikes. For vehicles like the Nissan Patrol, fitting a Dawes valve and needle valve can smooth the boost curve and prevent over-boosting, especially if the EGR is blanked. Clean or replace MAF and MAP sensors periodically, and inspect intercooler pipes for leaks during routine services.
In high-mileage or off-road applications, consider upgrading to a larger exhaust system to reduce backpressure, but pair it with ECU tuning. Avoid aggressive driving until the engine is warm, and allow a cool-down period after heavy use to prevent oil coking. These steps can extend turbo life significantly, often beyond 200,000 miles with diligent care.
10. How Sinspeed Can Help: Our Turbocharger Remanufacturing Service
At Sinspeed, established in the UK since 2007, we specialise in remanufacturing automotive components like turbochargers to exceed OEM standards. For the Garrett GT2052V, our process includes:
Full disassembly and inspection.
Replacement of faulty actuators, vanes, and bearings with upgraded, durable parts.
Balancing to precise tolerances for smooth operation.
Testing on specialised rigs to simulate real-world conditions.
Simply remove the turbo and send it to us via our easy repair form. Turnaround is typically 2-3 days, with common faults repaired for a fraction of new unit costs. Our expertise ensures your vehicle performs reliably, whether it’s a Nissan Patrol in off-road scenarios or an Audi A4 in daily driving.
11. Our Lifetime Warranty
Every remanufactured Garrett GT2052V turbo from Sinspeed comes with an unlimited mileage lifetime warranty, reflecting our confidence in the quality. This covers defects in materials or workmanship, giving you peace of mind. Contact us today to book your repair and keep your vehicle running strong.
12. Frequently Asked Questions
Q: What are the most common failure modes for the Garrett GT2052V turbocharger? A: The Garrett GT2052V commonly fails due to over-boosting, which can lead to piston damage in engines like the Nissan ZD30DDTi, as well as actuator sticking, vane seizure from carbon buildup, and sensor contamination from EGR soot or oil vapour. These issues are often exacerbated in high-mileage or modified vehicles, resulting in erratic boost and potential engine limp mode.
Q: How can I tell if my Garrett GT2052V turbo is failing? A: Early signs include loss of power under load, erratic acceleration, hissing noises from leaks, black exhaust smoke indicating over-fuelling, elevated exhaust gas temperatures (EGT), and activation of limp mode. Unusual whining or rattling may signal bearing wear, while fault codes like P0234 or P0299 on an OBD-II scanner confirm turbo-related problems.
Q: What causes over-boosting in the Garrett GT2052V turbo? A: Over-boosting often stems from faulty actuators, contaminated MAF or MAP sensors due to EGR recirculation or PCV oil vapour, or modifications like EGR blanking without proper boost control. In Nissan Patrol GU models, this is particularly notorious, potentially causing piston cracking if boost spikes exceed 20-25 psi.
Q: Is the Garrett GT2052V turbo suitable for petrol engines? A: While primarily designed for diesel applications like the ZD30DDTi or 2.5L TDI, some enthusiasts adapt it for petrol engines, but it may struggle with higher EGTs typical of petrol setups. Professional tuning and modifications are essential to avoid overheating or vane issues, though it’s not recommended without expert advice.
Q: How long does a Garrett GT2052V turbo typically last? A: With proper maintenance, it can last 100,000-200,000 miles, but premature failure is common around 80,000-120,000 miles in demanding conditions like off-roading or towing. Factors like oil quality, EGR system health, and avoiding modifications without tuning significantly impact lifespan.
Q: Can I repair the Garrett GT2052V turbo myself? A: DIY repairs are not advised due to the complexity of variable geometry components and the need for specialised tools like balancing rigs. Attempting fixes like actuator replacement risks further damage; professional remanufacturing, such as Sinspeed’s service, ensures upgraded parts and testing for reliability.
Q: What is the cost of replacing a Garrett GT2052V turbo? A: A new OEM unit can cost £1,000-£2,000 plus labour, while used ones risk repeated failures. Remanufacturing offers a cost-effective alternative at a fraction of the price, with upgrades to address design flaws—contact Sinspeed for a quote tailored to your vehicle.
Q: How can I prevent Garrett GT2052V turbo failure? A: Regular oil changes with high-quality synthetic diesel oil, installing an oil catch can, cleaning sensors periodically, and monitoring boost/EGT with gauges help. For vehicles like the Audi A4 or VW Transporter, avoid short trips that cause soot buildup, and consider boost controllers like a Dawes valve for spike prevention.
Q: Is the Garrett GT2052V interchangeable with other turbos? A: It shares part numbers across applications (e.g., 724639-5006S for Nissan, 454135-5010S for VW/Audi), but compatibility depends on engine specifics. Always cross-reference OEM numbers and consult a specialist; hybrid upgrades may fit but require ECU remapping.
Q: What should I do if my vehicle throws turbo-related fault codes? A: Scan with an OBD-II tool to identify codes like P0101 (MAF performance) or P0400 (EGR malfunction). Clean sensors, check for leaks, and address root causes. If persistent, send the turbo for professional inspection and remanufacturing to avoid engine damage.
Summary: The BorgWarner K03/K04 series turbocharger is one of the most common forced-induction units fitted to VAG petrol engines (1.8T & 2.0T TSI/TFSI) in models such as the Volkswagen Golf, Audi A3/A4/TT, and Porsche Macan. Despite their compact, water-cooled design, these turbos are notorious for premature failure — typically between 50,000–80,000 miles — due to inherent weaknesses like wastegate pivot corrosion and oil starvation.
At Sinspeed we’ve remanufactured thousands of these exact K03/K04 units since 2007, repeatedly seeing the same failure patterns: rattling or seized wastegates, oil-burning blue smoke, whining bearings, loss of boost, and limp-mode activation. This comprehensive guide details every aspect — from how the turbo works and the most common symptoms to affected vehicles, part numbers, diagnosis steps, and why professional remanufacturing with upgraded components far outperforms buying a new £800–£2,500 OEM replacement.
If your VAG 1.8T or 2.0T petrol engine is suffering power loss, unusual noises, or smoke, this is the definitive resource. When diagnosis confirms the turbo is at fault, send it to the UK’s largest specialist turbo remanufacturer — explore our K03/K04 turbo repair service from £185 +VAT with lifetime unlimited-mileage warranty and 2–3 day turnaround.
The BorgWarner K03/K04 series turbocharger is one of the most widely used forced induction systems in VAG Group (Volkswagen, Audi) vehicles, powering everything from compact hatchbacks to premium SUVs. At SinSpeed, we’ve remanufactured thousands of these turbos since 2007, addressing their notorious failure points with uprated components and lifetime warranties. These turbos often fail prematurely due to design vulnerabilities like wastegate corrosion and oil starvation, leading to costly breakdowns. This pillar page is your complete resource on the K03/K04, covering its design, common issues, affected models, and why professional remanufacturing is the smartest solution. If you’re experiencing power loss or smoke in your VW Golf or Audi A3, this guide will help you identify the issue and decide next steps.
The BorgWarner K03 and K04 series are compact, high-efficiency turbochargers designed for small-displacement petrol engines, primarily in the Volkswagen Audi Group (VAG) lineup. Introduced in the late 1990s for the 1.8T engine and evolved for 2.0T TSI/TFSI motors, the K03 is the base model for entry-level applications, while the K04 is an upgraded variant with a larger compressor wheel for higher flow for higher boost for mid-range performance. These turbos deliver reliable boost for 1.8L to 2.0L engines, producing 150–225 horsepower in stock form. They feature a water-cooled bearing housing for longevity, an internal wastegate for precise boost control, and a cast-iron turbine housing for durability.
Despite their reliability in mild use, K03/K04 turbos have gained a reputation for early failures in high-mileage VAG models, often between 50,000–80,000 miles. Reports from the Automotive Protection Association (APA) highlight widespread issues in 2009–2020 models, leading to class actions and recalls in some regions. At SinSpeed, we’ve seen these turbos fail in patterns tied to oil quality, driving habits, and inherent weaknesses like wastegate pivot corrosion. If you’re experiencing reduced performance, this guide will help identify if your K03/K04 is the culprit.
To answer a common question: the K03/K04 series is designed exclusively for petrol engines in OEM VAG applications. It does not fit diesel engines, which typically use different BorgWarner series like the BV or Garrett GTB for TDI models. This focus on petrol ensures optimal performance in high-revving TSI/TFSI setups, but it also means diesel owners should check for BV-series equivalents.
2. How the K03/K04 Turbo Works: Basic Principles
The K03/K04 operates on the exhaust-driven principle: hot exhaust gases from the engine cylinders enter the turbine housing, spinning the turbine wheel at speeds up to 200,000 RPM. This turbine is connected via a shaft to the compressor wheel, which draws in ambient air, compresses it, and forces it into the intake manifold at pressures up to 1.5 bar, increasing oxygen density for more efficient combustion and power. The twin-scroll design separates exhaust pulses from paired cylinders (e.g., 1-4 and 2-3), reducing lag and enabling quick spooling from as low as 1,500 RPM.
Key components include the compressor housing (aluminium for lightweight heat dissipation), turbine housing (cast iron for extreme heat resistance up to 950°C), centre housing rotating assembly (CHRA) with oil-lubricated journal bearings, and the wastegate assembly. The wastegate, controlled by a vacuum actuator (pneumatic on K03, often electronic on K04), bypasses excess exhaust to regulate boost and prevent overpressurisation. Water cooling in the bearing section helps manage thermal loads, while the actuator rod adjusts the wastegate flap for precise control. In VAG vehicles, the turbo integrates with the engine’s ECU via the CAN bus, monitoring parameters like boost pressure (via MAP sensor), turbine speed, and actuator position to adjust fuel and ignition timing. Faults in this system can trigger limp mode, restricting power to protect the engine from detonation or compressor surge. Understanding this integration is crucial, as turbo problems often mimic sensor or ECU faults, leading to misdiagnosis.
3. Common Symptoms of K03/K04 Turbo Failure
K03/K04 failures develop gradually, starting with subtle performance dips and escalating to total boost loss. Key symptoms include:
Power Loss and Limp Mode: The engine feels sluggish, with delayed acceleration or “turbo lag” extending beyond 2,000 RPM. The ECU may trigger limp mode (reduced power, check engine light on) to prevent damage from over/underboost, limiting RPMs to 3,000–4,000. This is particularly noticeable uphill or during overtaking.
Unusual Noises: A loud whistling or whining from the engine bay during acceleration indicates compressor wheel damage or bearing wear, often from imbalance. Rattling at idle or low RPMs suggests wastegate flap looseness or shaft play, a common issue in VAG 1.8T engines after 60,000 miles. Grinding noises point to turbine contact with the housing.
Exhaust Smoke: Blue smoke from burning oil (worn seals/bearings leaking into the exhaust); black smoke from overfuelling due to low boost (engine compensates with more fuel); white smoke if coolant leaks into the exhaust from cracked housing or lines. Smoke is most visible on startup or acceleration.
Boost Pressure Irregularities: Overboost (engine knocking or pinging from excessive pressure) from a stuck wastegate, or underboost (hesitation and flat spots) from actuator leaks or bearing drag. Fuel economy can drop 15–25% as the engine works harder without efficient boost.
Warning Lights and Codes: Check engine light with boost-related DTCs (e.g., P0299 underboost, P0234 overboost). In VAG models, the EPC light may activate, and the car may enter emergency mode. These symptoms often worsen in cold weather or after short trips, as thermal cycling accelerates wear on the wastegate and bearings.
4. Most Common Causes of K03/K04 Turbo Failure
From our experience remanufacturing thousands, K03/K04 failures are predictable and often linked to maintenance neglect or design limitations. Top causes:
Wastegate and Actuator Issues (40–50%): The wastegate shaft pivot corrodes and seizes from moisture, heat cycles, and exhaust residue, causing over/underboost. Actuator diaphragm tears or rods bend from pressure spikes, a known flaw in VAG 1.8T engines exacerbated by modified tunes. APA reports note this as a systemic issue in 2009–2020 models, leading to recalls in Canada for wastegate rattle and failure.
Oil Starvation and Contamination (30–40%): Poor oil quality, infrequent changes, or clogged filters starve the bearings, leading to shaft scoring, imbalance, and eventual seizure. Carbon buildup from short trips or low-quality fuel blocks oil drains, while high EGTs (from aggressive driving) coke the oil.
Bearing and Shaft Wear (15–20%): High exhaust gas temperatures (EGTs over 900°C) from lack of cooldown periods cook the journal bearings, causing play and vibration. Debris from failing piston rings or air filters accelerates this, leading to wheel rub and catastrophic failure.
Compressor/Turbine Damage (10–15%): Foreign object damage (FOD) from intake leaks ingests debris, shearing blades. Overrevving or boost spikes beyond 1.5 bar fatigues the compressor wheel.
Other Factors: Coolant line leaks cause overheating; modified tunes without upgraded intercoolers overload the unit. Reliability data from Consumer Reports shows 2009–2017 VAG 2.0T models with turbo failure rates 2–3x higher than average, often linked to oil system neglect.
5. Affected Vehicles: Models, Years, and Engines
Manufacturer
Model
Years
Engine
Volkswagen
Golf / GTI / Jetta
2009–2020
1.8T / 2.0 TSI
Volkswagen
Golf R
2016–2019
2.0 TSI
Volkswagen
Atlas
2018+
2.0 TSI
Volkswagen
Tiguan
2009–2017
2.0 TSI
Audi
A3 / A4 / Q5
2009–2020
1.8T / 2.0 TFSI
Audi
A5
2008–2018
2.0 TFSI
Audi
TT
2009+
2.0 TFSI
Porsche
Macan
2015+
2.0T
Note: These are petrol-only applications. The K03/K04 series is not designed for diesel engines, which use different BorgWarner models like the BV43 for VAG TDI variants.
6. K03/K04 Turbo Part Numbers Section
The K03/K04 series has numerous part numbers based on application, with cross-compatibility in many VAG 1.8T/2.0T setups. Always verify by VIN or engine code to ensure fitment. Here’s a detailed breakdown of common OEM and BorgWarner numbers, including supersessions and equivalents:
[Pending table goes here]
This list covers the most frequent numbers we see at Sinspeed, but variations exist for emissions standards or regional specs.
7. How to Diagnose K03/K04 Turbo Issues
Diagnosis starts with a scan for boost-related codes, followed by pressure testing and visual checks. Use a professional scanner to log boost, actuator position, and wastegate duty cycle during a test drive. Low boost with high duty cycle points to wastegate seizure; overboost suggests actuator failure. Smoke tests reveal leaks, while endoscope inspections check for shaft play or wheel damage. Always rule out oil system issues with a pressure gauge before condemning the turbo.
8. Repair vs. Replace: Why Remanufacturing Beats Buying New
New OEM turbos cost £800–£2,500 but often fail again due to the same design flaws (e.g., wastegate pivot corrosion). Remanufacturing addresses root causes, upgrading pivots, bearings, and actuators for superior longevity. It’s eco-friendly (reduces waste) and costs 40–60% less than new.
9. Sinspeed’s K03/K04 Turbo Remanufacturing Service
We remanufacture K03/K04 turbos with a 2–3 working day turnaround. Every unit is bench tested, stripped down to component level, and rebuilt with genuine OEM or uprated components to eradicate design flaws. Lifetime warranty, unlimited mileage, fully plug-and-play.
10. Prevention Tips for K03/K04 Turbo Longevity
Use high-quality synthetic oil, change every 4,000–6,000 miles, cooldown after hard drives, avoid short trips, and monitor for early symptoms with regular scans.
11. Frequently Asked Questions
Q: How long do K03/K04 turbos last? A: 50,000–80,000 miles, but failures accelerate with poor maintenance.
Q: Can I drive with a faulty turbo? A: Not recommended — risk of engine damage from overboost/underboost.
Q: What’s the cost to remanufacture? A: Competitive — contact us for a quote.