Ford Transit Electronic Turbo Actuator Repairs
Summary: The Ford Transit electronic turbo actuator is one of the most commonly failed components across the entire Transit range — from the MK7 2.2 TDCi right through to the MK8 2.0 EcoBlue. When it fails, your van goes into limp mode, loses power and may store fault codes your local garage can’t decipher. Replacing the whole turbocharger — because the actuator isn’t sold separately by Ford — can cost well over £1,200 plus labour. There is a far better option.
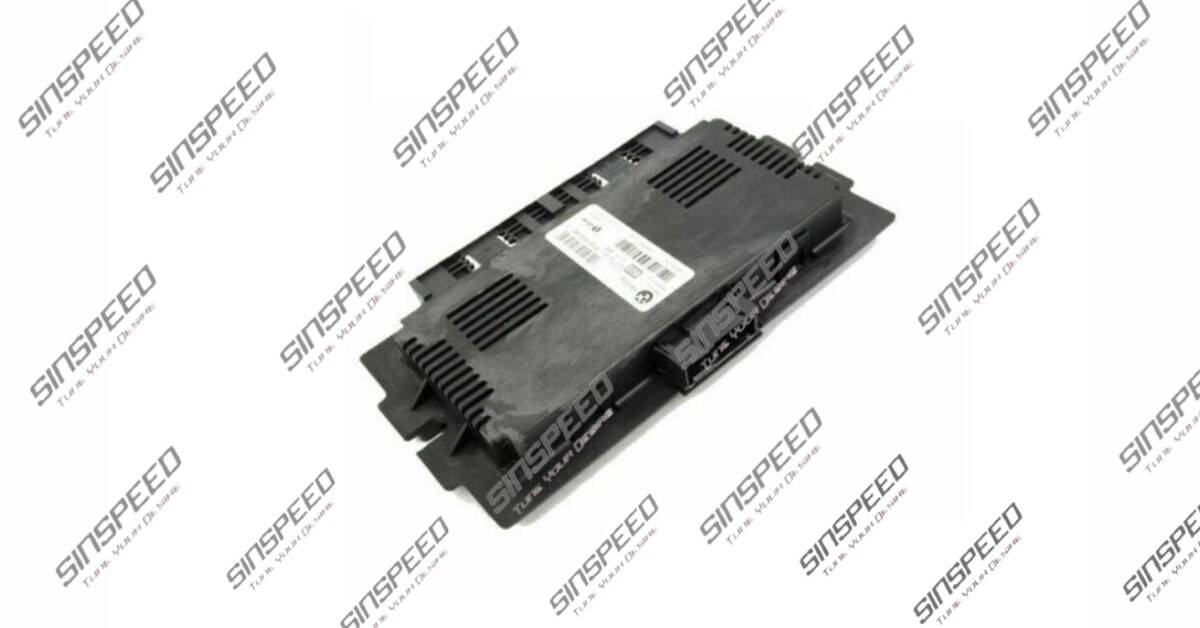
Sinspeed has been remanufacturing electronic turbo actuators since 2007, using genuine OEM-grade components, with a lifetime unlimited-mileage warranty as standard on every repair. You remove the actuator, post it to us from anywhere in the UK or internationally, and we return it rebuilt, tested and ready to refit — no programming required.
Table of Contents
- What Is an Electronic Turbo Actuator and What Does It Do?
- Which Ford Transit Models and Engines Are Affected?
- Common Fault Codes
- Symptoms of a Failing Ford Transit Turbo Actuator
- What Causes the Electronic Turbo Actuator to Fail?
- Repair vs. Replacement: Costs Compared
- The Sinspeed Ford Transit Turbo Actuator Repair Service
- How Our Mail-In Repair Process Works
- Why Choose Sinspeed?
- FAQs
- Final Thoughts
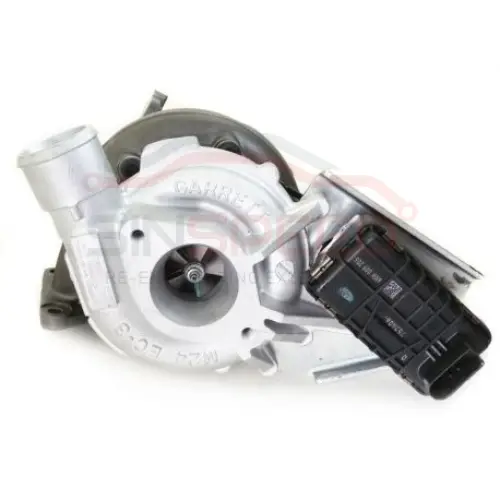
What Is an Electronic Turbo Actuator and What Does It Do?
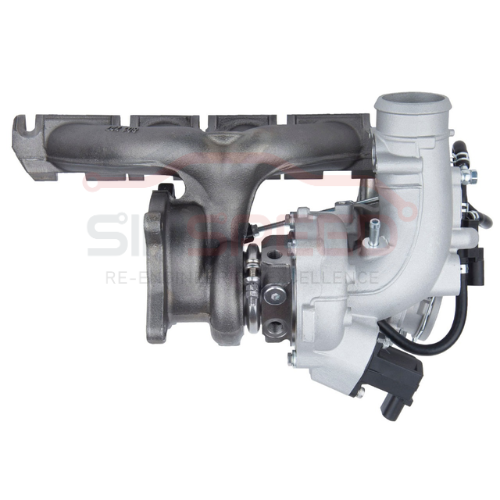
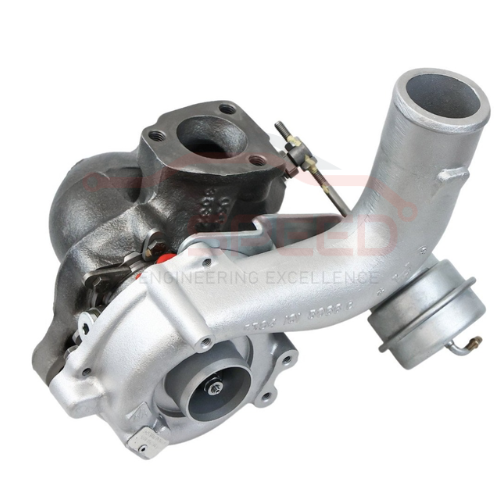
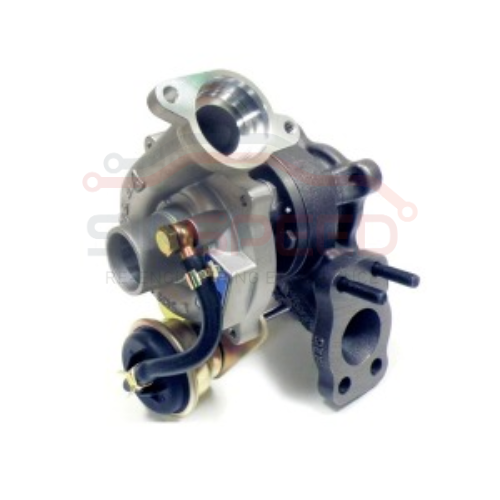
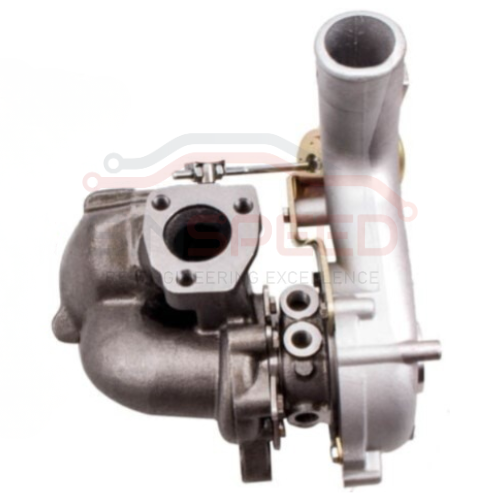
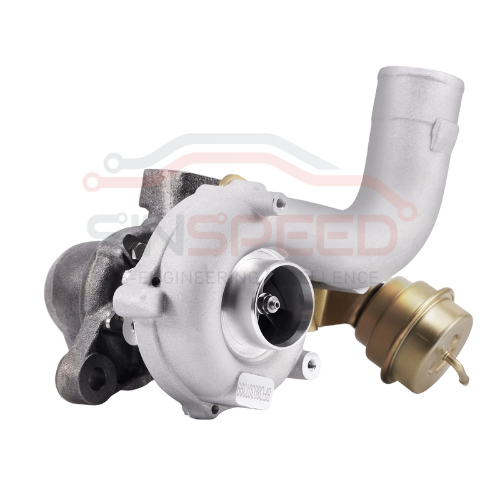
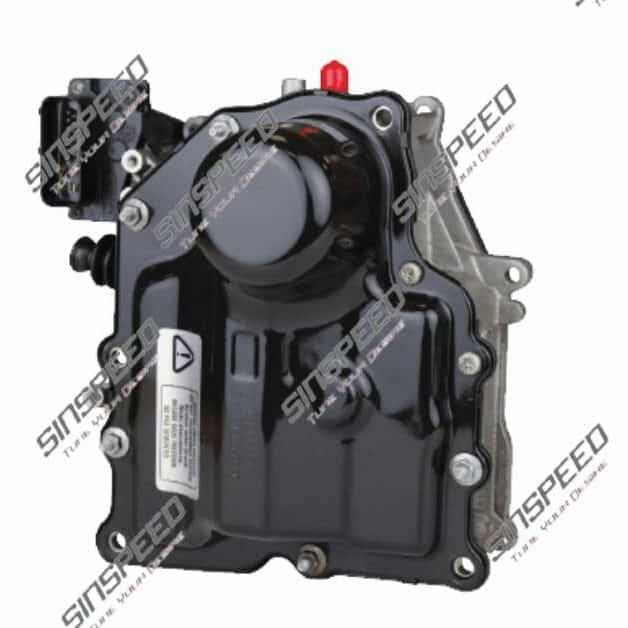
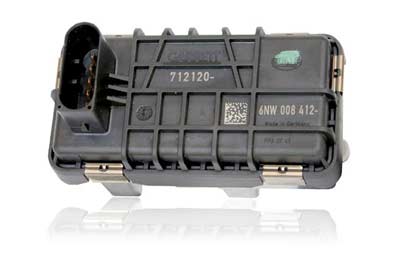
Modern Ford Transit diesel engines use a Variable Geometry Turbocharger. The electronic turbo actuator is the component that precisely controls the turbo’s boost pressure by adjusting the internal vanes. It receives signals from the engine ECU and ensures the turbo delivers the right amount of boost for smooth power and good fuel economy. When it fails, the system can no longer control boost correctly, triggering limp mode and fault codes.
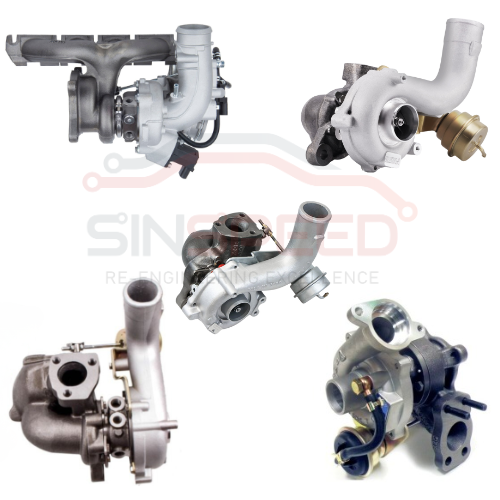
Which Ford Transit Models and Engines Are Affected?
Electronic turbo actuator failure is not limited to one generation of Transit. The following models and engine variants are among those commonly affected:
Ford Transit MK7 (2006–2014) — 2.2 TDCi
The MK7 fitted with the 2.2 TDCi Duratorq engine in 85 PS, 100 PS, 115 PS, 125 PS and 140 PS outputs is the most widely reported Transit for electronic turbo actuator failure. The Hella actuator (common part number G41752406 / 6NW009206) fitted to these vehicles is a known weak point. Fault codes P132A and P132B are the most common findings on this generation. Vehicles built between 2008 and 2014 are the most affected, though earlier MK7 2.2s with the Hella-type unit can also present the same faults.
Ford Transit MK8 (2014–present) — 2.2 TDCi
The early MK8 continued with the 2.2 TDCi before the switch to the EcoBlue engine. These vehicles carry the same actuator architecture as the later MK7 and are equally susceptible to the same failure modes.
Ford Transit MK8 (2016–present) — 2.0 EcoBlue TDCi
The 2.0 EcoBlue (also badged 2.0 TDCi) replaced the 2.2 TDCi from around 2016. Ford Transit Custom models fitted with this engine have been widely reported as suffering from poor performance linked to a faulty turbocharger actuator. Fault code P2599 is the most commonly associated code on these vehicles.
Ford Transit Custom (2013–present) — 2.0 TDCi / 2.0 EcoBlue
The Transit Custom, Ford’s smaller panel van in the Transit family, shares the same 2.0 TDCi and 2.0 EcoBlue engines found in the full-size Transit. Turbocharger actuator faults resulting in limp mode and loss of power have been identified as a common issue on these vehicles across multiple model years.
Other Ford Vehicles Using the Same Actuator
The Hella electronic turbo actuator used in the Transit MK7 2.2 TDCi is also found in other Ford models of the same era, including the Ford Mondeo, Ford Galaxy, Ford S-Max and Ford Kuga fitted with compatible 2.2 TDCi or 1.8 TDCi engines. If you drive one of these vehicles and are experiencing the same symptoms, contact us — we may be able to help.
Common Fault Codes
When the turbo actuator fails, the engine ECU detects the anomaly and stores one or more of the following fault codes:
| Fault Code | Description |
| P132A | Turbocharger/Supercharger Wastegate Actuator A — Circuit Range/Performance |
| P132B | Turbo Boost Control ‘A’ — Performance |
| P2263 | Turbo/Super Charger Boost System Performance |
| P0234 | Turbocharger/Supercharger ‘A’ — Overboost Condition |
| P0299 | Turbocharger/Supercharger ‘A’ — Underboost Condition |
| P2599 | Turbocharger/Supercharger Boost Control ‘A’ Position — Performance (common on 2.0 EcoBlue/TDCi) |
A critical point worth noting: codes P132A and P132B frequently come up as ‘unknown’ or undefined on many generic OBD2 scanners. Your mechanic’s scanner may not recognise them. These codes are Ford-specific and directly relate to the electronic turbo actuator. If you have been told a code is unrecognised or your garage is unsure what it points to, this page and our repair service are exactly what you need.
Symptoms of a Failing Ford Transit Turbo Actuator
Turbo actuator failure on the Ford Transit rarely happens without warning. The fault typically starts as an intermittent issue — perhaps appearing under hard acceleration or during extended motorway driving — and becomes progressively worse until it is permanent. Recognising the early signs can prevent more serious and costly secondary damage.
The most common symptoms include:
- Limp mode — The engine management system detects a boost control fault and limits engine power to protect the drivetrain. The van feels gutless, particularly above 2,000 RPM.
- Flashing glow plug warning light — The glow plug light flashing while driving is a well-known indicator of a boost system fault, including actuator failure.
- Engine management light (EML) illuminated — The ECU stores a fault and triggers the warning light.
- Loss of power under acceleration — Particularly noticeable when pulling away from junctions, when loaded, or when climbing inclines.
- Intermittent loss of power — The fault clears temporarily when the ignition is cycled (switched off and restarted), only to return after a period of driving. This is a hallmark of early-stage actuator failure.
- Black smoke from the exhaust — When the vanes are stuck in the wrong position, combustion becomes inefficient and unburnt fuel exits via the exhaust.
- Poor fuel economy — Incorrect boost pressure forces the engine to work harder for the same output, consuming more fuel.
- Unusual turbo noises — Whistling, whining or rattling from the turbo area, particularly under load, can indicate that the vane mechanism is not moving freely.
- Actuator arm not moving — If the actuator is physically inspected with the engine off, the arm may be seized or showing no resistance.
- Traction control light illuminating alongside EML — Particularly common on MK7 and early MK8 Transit models.
Important: Several of these symptoms — particularly limp mode and loss of power — can also be caused by other faults including boost pressure leaks (cracked intercooler hoses, split boost pipes), a faulty MAP/boost pressure sensor, EGR valve issues, a DPF fault or even an engine ECU fault. Proper diagnostic scanning and a process of elimination is always recommended before committing to any repair.
What Causes the Electronic Turbo Actuator to Fail?
The electronic turbo actuator lives in one of the harshest environments in the engine bay — mounted directly on the turbocharger, which itself reaches extreme temperatures during operation. Several factors can lead to failure:
Turbocharger fault
This is the most common underlying cause of actuator-related problems on the Ford Transit, particularly on vehicles used predominantly for short urban journeys. When the turbocharger starts to fail, it can accelerate the wear on the turbo actuator.
Heat and vibration
Constant thermal cycling (the repeated heating and cooling of the engine bay) combined with road vibration slowly wears the internal parts of the actuator. Over many thousands of miles this natural ageing process leads to loss of precise control.
Water ingress and corrosion
The actuator’s position on the turbocharger makes it vulnerable to moisture intrusion, particularly in UK driving conditions. Water ingress causes internal corrosion, interferes with the electronic components and can cause erratic feedback signals to the ECU.
Wiring and connector failure
The actuator communicates with the ECU via a wiring harness and multi-pin connector. Vibration, heat cycling and age can cause connector pins to loosen or the insulation on wires to chafe and crack. A poor electrical connection is often intermittent — the van runs fine in some conditions but faults when the connector flexes under temperature or vibration.
Position sensor failure
The actuator contains an integrated position sensor (a potentiometer or Hall effect sensor) that feeds vane position data back to the ECU in real time. When this sensor drifts out of calibration or fails outright, the ECU cannot confirm whether its commands are being executed — triggering fault codes and limp mode even if the mechanical parts are intact.
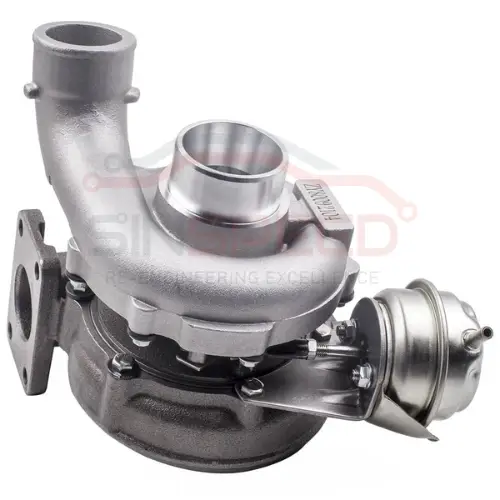
Repair vs. Replacement: Costs Compared
When a Ford Transit turbo actuator fails, many Ford dealers and garages quote for a complete turbocharger replacement. This is because Ford does not supply the electronic actuator as a standalone replacement part — it is only available as part of a complete turbocharger assembly. This creates an artificially high repair cost that catches Transit owners off guard.
| Option | Typical Cost | Warranty | Notes |
| New turbocharger (dealer/OEM) | £1,200–£2,000+ (parts only) | 12 months | Actuator not sold separately by Ford |
| Turbocharger replacement (independent) | £800–£1,500 incl. fitting | 12 months typical | Still replacing components that may not need replacing |
| Remanufactured turbo actuator (Sinspeed) | From £100 | Lifetime, unlimited mileage | Only the faulty component remanufactured |
The Sinspeed remanufacture route targets only the component that has actually failed — the electronic actuator. The turbocharger itself remains on your van, and the actuator is removed, sent to us, rebuilt with OEM-grade components, tested and returned. There is no need to purchase an entirely new turbo assembly, and our repair carries a lifetime unlimited-mileage warranty — significantly superior to the 12-month cover offered with new replacement units.
For fleet operators, sole traders and owner-drivers where the Transit is essential to daily income, keeping downtime and costs to a minimum matters enormously. Our mail-in repair process is designed with exactly that in mind.
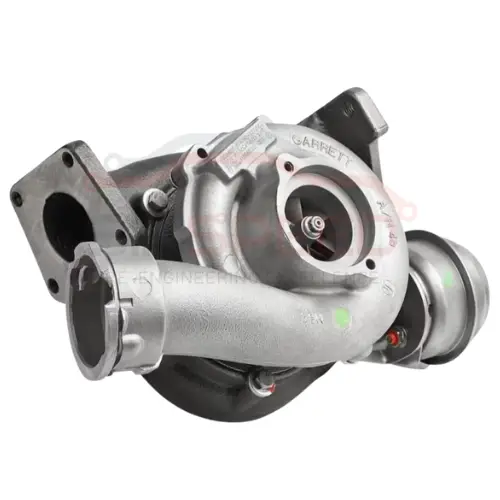
The Sinspeed Ford Transit Turbo Actuator Repair Service
Sinspeed has been remanufacturing automotive electronics since 2007 — that is over 18 years of specialist experience. Our Ford Transit turbo actuator repair service covers the full range of affected models, including the MK7 2.2 TDCi and MK8 2.0 TDCi / EcoBlue variants.
What our remanufacture process delivers:
- Full strip-down and inspection of the complete actuator assembly
- Identification and replacement of all failed and wear-prone internal components using OEM-grade parts
- Full bench testing against OEM specifications before despatch
- No coding required on refit — the repaired unit is plug-and-play on return
Every repaired Ford Transit turbo actuator leaves our workshop covered by a lifetime, unlimited-mileage warranty.
Our repairs are used by independent garages, fleet operators and dealerships across the UK and internationally. We accept mail-in repair enquiries from anywhere in the UK and from international customers worldwide.
How Our Repair Process Works
Sending your Ford Transit turbo actuator to Sinspeed is straightforward. Here is the process step by step:
Step 1 — Remove the actuator from the vehicle
The electronic actuator is a bolt-on component mounted directly to the turbocharger housing. On the MK7 Transit 2.2 TDCi, the turbo is accessible from above on the driver’s side. The actuator itself is secured by mounting bolts and connected via a multi-pin electrical connector. You do not need to remove the turbocharger from the vehicle to remove the actuator — the actuator can be unbolted and unplugged independently on most Transit variants. If you are unsure, your local garage can assist with the removal.
Step 2 — Complete the repair form and send your unit to us
Complete our online repair form so we can log your job and prepare for your unit’s arrival. After completing, you will have the option to print it off to place inside the box. Pack the actuator securely in a padded box with bubble wrap to protect it during transit. Send your unit via a tracked courier service to our workshop. We accept units from anywhere in the UK and internationally.
Step 3 — Testing and remanufacture
Once your actuator arrives, our engineers test it to confirm the fault, carry out the rebuild process and test to confirm full functionality.
Step 4 — Return despatch with lifetime warranty
Your fully repaired actuator is despatched back to you, covered by our lifetime unlimited-mileage warranty. Simply refit and reconnect — no coding required.
Why Choose Sinspeed?
- 18+ years of specialist experience — remanufacturing automotive electronics since 2007
- Lifetime unlimited-mileage warranty on every Ford Transit turbo actuator repair.
- Up to 90% cheaper than a dealer turbocharger replacement — you pay for what is actually broken
- No programming required — repaired units are plug-and-play
- Mail in from anywhere — UK and international customers welcome
- Fast turnaround — we understand the Transit is a working vehicle and downtime costs money
- Genuine OEM-grade components — we do not cut corners with inferior parts
- Used by dealerships and independent garages across the UK — our work is trusted at every level of the trade
FAQs
Will my Ford Transit turbo actuator need programming after repair?
No. Our rebuilt turbo actuators are returned as plug-and-play units. They do not require any coding or programming when refitted to the vehicle. Simply bolt the actuator back onto the turbocharger, reconnect the electrical connector, clear any stored fault codes with a diagnostic scanner, and the van is ready to drive.
Can I still drive my Ford Transit with a faulty turbo actuator?
We strongly advise against extended driving once symptoms have appeared. When the actuator fails, the vanes can become stuck in either an overboost or underboost position. Overboost places excessive mechanical stress on the engine internals and can cause serious damage in a short period. Underboost is less immediately dangerous but will leave you without adequate power and in limp mode. If the van goes into limp mode, cycling the ignition may restore temporary power but have the vehicle attended to as soon as possible.
My garage says I need a new turbocharger — do I definitely need a full replacement?
Not necessarily. The most common cause of limp mode and turbo-related fault codes on the Ford Transit is the electronic actuator, not the turbocharger itself. The reason garages quote for a full turbo is that Ford does not supply the actuator as a separate part. Sinspeed remanufactures the actuator independently, saving you the cost of a complete turbo assembly. If you have fault codes P132A, P132B, P2263, P0234, P0299 or P2599, contact us before agreeing to a full turbo replacement.
How long does the repair take?
Turbo actuator repairs are typically completed within 1-2 working days.
Can I send my actuator from outside the UK?
Yes. We regularly receive units from international customers. If you are sending from outside the UK, please contact us before shipping so we can advise on the best courier options and any relevant customs documentation required.
What warranty do I get on a repaired Ford Transit turbo actuator?
Every repaired turbo actuator carries a lifetime, unlimited-mileage warranty as standard. There are no mileage caps and no time limits. This applies to all Ford Transit actuator repairs carried out by Sinspeed.
Are there any other faults that can mimic turbo actuator failure?
Yes. Boost leaks from cracked intercooler hoses or split boost pipes, a faulty MAP (manifold absolute pressure) sensor, a failing boost pressure sensor and in some cases an engine ECU fault can all produce similar symptoms and even similar fault codes. We always recommend a thorough diagnostic check — including physical inspection of all boost-related hoses and sensors — before concluding the actuator is at fault. If in doubt, contact us with your fault codes and vehicle details and we will advise.
Final Thoughts
The Ford Transit electronic turbo actuator is one of the most frequently failing components across the entire Transit range — and one of the most expensive problems to fix if you take the dealer route of a complete turbocharger replacement. The good news is that in the vast majority of cases, the turbocharger itself is perfectly serviceable. It is the actuator — a relatively compact electronic assembly — that fails, and it can be rebuilt to a standard that meets or exceeds the original specification.
Sinspeed has been doing exactly this since 2007. With over 18 years of specialist experience, a genuine lifetime unlimited-mileage warranty on every repair, and a mail-in service that accepts units from anywhere in the UK or internationally, there is no reason to accept a £1,200-plus dealer quote when a professional remanufacture is available at a fraction of the cost.
If your Ford Transit is in limp mode, the glow plug light is flashing or your diagnostic scanner has thrown up codes pointing at the turbo actuator, get in touch to see how we can help.